Achieving perfect ombre eyebrows requires a combination of proper technique, expert guidance, and diligent aftercare. Ombre brows have gained significant popularity for their natural-looking gradient effect, which provides a soft yet defined brow without the need for daily makeup application. This guide will walk you through the secrets of achieving and maintaining flawless ombre eyebrows, ensuring long-lasting results.
Let’s get straight to the point
Achieving perfect ombre eyebrows requires selecting an experienced technician, ensuring precise brow mapping for symmetry, choosing the right pigment for your skin tone, and mastering the ombre application technique for a natural gradient effect. Proper aftercare, including keeping the brows dry and avoiding makeup during healing, is essential to prevent fading and ensure long-lasting results.
Regular touch-ups, usually 6-8 weeks after the initial session and annually after that, help maintain shape and vibrancy. Avoid common mistakes like skipping consultations and touch-ups for flawless, defined brows.
1. Choosing The Right Technician
The foundation of perfect ombre eyebrows begins with selecting an experienced and skilled technician.
Do Your Research
It’s essential to research potential artists thoroughly. A well-trained artist will have a portfolio showcasing their work with various skin tones and brow shapes. Look for client reviews and ask for recommendations. Avoid basing your decision solely on price—quality comes at a price, and opting for a cheaper artist can result in unsatisfactory results.
Schedule A Consultation
Before committing, always schedule a consultation. This is the time to discuss your desired shape, colour, and style with the technician. A good artist will assess your facial features, natural brow shape, and skin tone to create the best plan for your ombre brows.
Assess Their Experience
Ask about the technician’s experience with the ombre brow technique. An experienced artist will confidently explain the procedure and address any concerns you may have. Make sure they use high-quality, sterile equipment, as this affects both your safety and the final result.
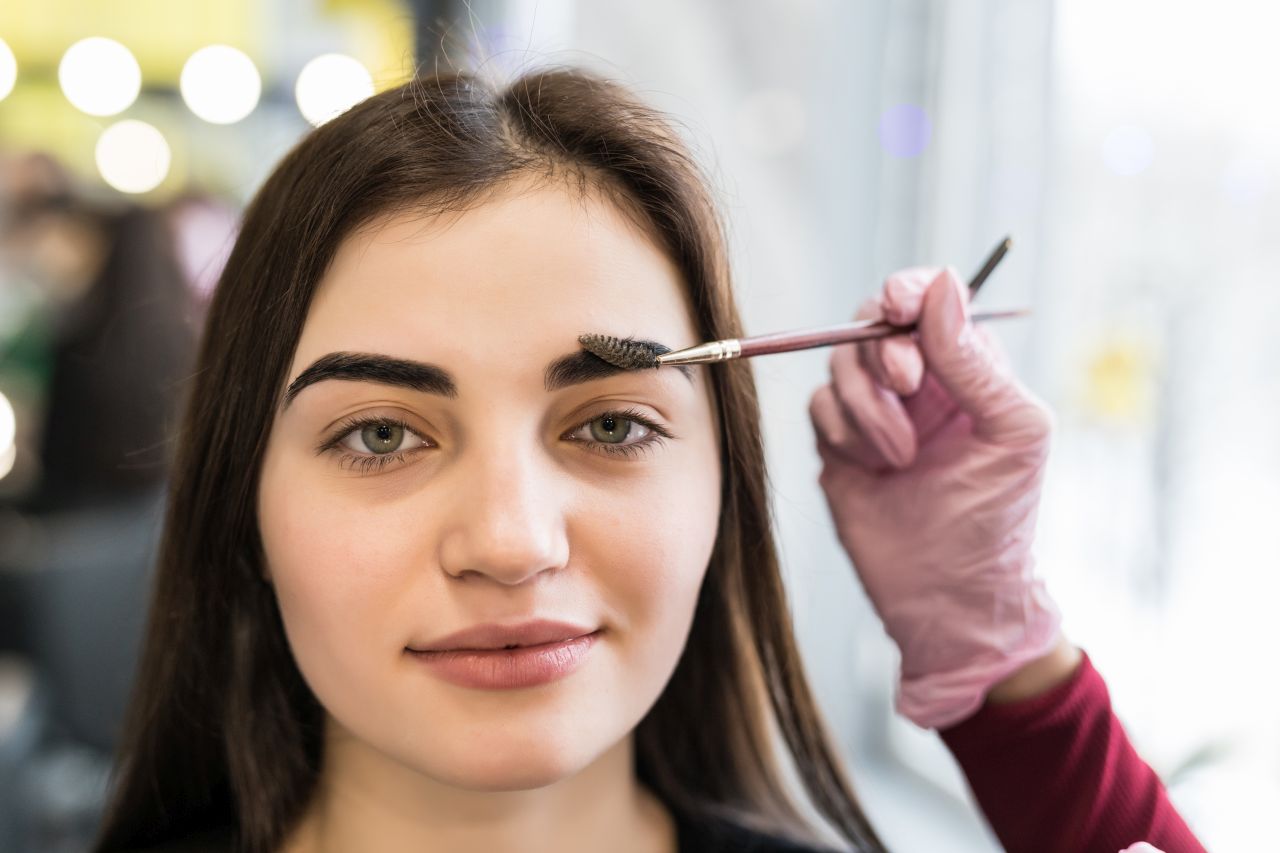
2. Perfect Mapping For Symmetry
Symmetry is key when it comes to ombre eyebrows. Perfect brow mapping ensures that your brows are even and well-proportioned to suit your facial structure.
Step-By-Step Mapping Process
- Identify Natural Brow Shape: The artist will begin by assessing your natural brow shape, considering the proportions of your face.
- Measure Key Points: They will measure key points on your face—such as the start, arch, and tail of the brow—to ensure symmetry.
- Sketch the Shape: Using a pencil or specialised tool, the technician will sketch the outline of your brows to give you a clear idea of the final result.
- Adjustments: During this stage, you can provide feedback, and adjustments can be made to ensure you are happy with the shape before the actual procedure begins.
Achieving The Right Arch
Not every brow shape suits every face. A skilled technician will know how to customise your brow arch to flatter your facial features, whether you prefer a high arch for a dramatic look or a softer, more natural arch.
3. Pigment Selection: Getting The Colour Right
The colour of the pigment plays a vital role in the overall appearance of your ombre brows. Choosing the right shade ensures your brows look natural and blend seamlessly with your complexion and hair colour.
Factors To Consider When Choosing Pigment
- Skin Tone: Cooler undertones suit ashier shades, while warmer skin tones benefit from browns with warm undertones.
- Hair Colour: If your hair is light, opt for a shade close to your natural brow colour but slightly darker for definition. For dark hair, slightly lighter brows create a balanced, softer look.
- Fading: Keep in mind that the pigment will fade over time. The initial colour may appear darker, but it will lighten after the healing process, so choose a shade slightly darker than your desired final result.
Customised Pigment Blending
Experienced technicians can blend pigments to create a custom colour specifically tailored to your skin tone and personal preferences. This personalised approach ensures that your ombre brows complement your natural features.
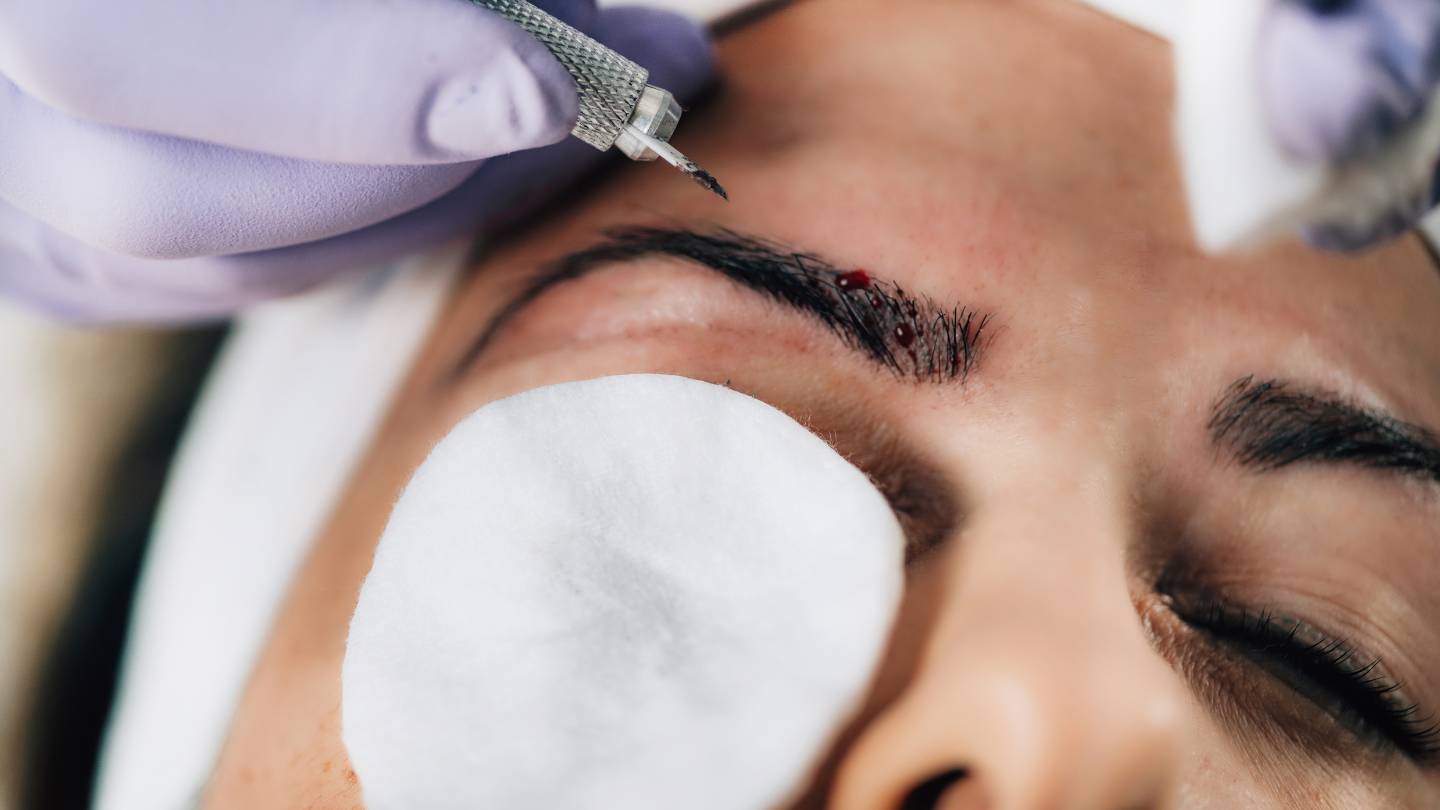
4. The Ombre Technique: Applying Pigment With Precision
The key to perfect ombre brows is in the application technique. This involves layering the pigment to create a natural gradient effect that starts lighter at the beginning of the brow and gradually darkens toward the tail.
How The Ombre Effect Is Created
- Stippling Method: The technician uses a machine to deposit tiny dots of pigment into the skin. This stippling technique ensures an even distribution of colour, creating a soft, powdered look.
- Layering for Depth: The lighter pigment is applied first at the head of the brow, followed by progressively darker shades towards the tail, building depth and definition as the layers are added.
- Adjusting Intensity: The technician will adjust the pressure and depth of the machine to control the intensity of the pigment, allowing for a more subtle or dramatic effect based on your preference.
Minimal Pain
The ombre brow technique is relatively painless due to the numbing cream applied before the procedure. Most clients experience little to no discomfort during the process.
5. Aftercare: Ensuring Long-Lasting Results
Proper aftercare is essential for ensuring that your ombre brows heal well and retain their colour. Without the right care, you risk fading, patchiness, or even infection.
Essential Aftercare Steps
- Keep the Area Dry: For the first 7-10 days, avoid getting your brows wet. This means no swimming, heavy sweating, or exposure to excessive moisture.
- Use a Healing Ointment: Apply a thin layer of the recommended ointment as instructed by your technician. This helps keep the area moisturised and promotes healing without smothering the skin.
- Avoid Makeup and Touching the Brows: Refrain from applying makeup or touching the brows during the healing process to avoid irritation or infection.
Dealing With Scabbing And Flaking
It’s natural for your brows to form scabs and flake as they heal. Do not pick at the scabs, as this can result in pigment loss or uneven healing. Allow them to fall off naturally.
Sun Protection
After your brows have healed, apply sunscreen to protect the pigment from UV damage. Sun exposure can cause the pigment to fade faster, so it’s essential to keep your brows shielded from direct sunlight.
6. Touch-Ups: Maintaining The Ombre Brows
Ombre eyebrows are semi-permanent, meaning they will require touch-ups to maintain their shape and colour. A touch-up session is usually scheduled 6-8 weeks after the initial treatment, followed by annual maintenance sessions.
Why Touch-Ups Are Important
- Perfecting Colour and Shape: The initial session sets the foundation, but the touch-up allows for adjustments in colour and shape, ensuring an even, consistent look.
- Addressing Fading: Some areas may fade more than others, especially if you have oily skin. A touch-up ensures that the pigment remains even and vibrant.
Annual Maintenance
Regular touch-ups, typically once a year, keep the brows looking fresh and defined. Without maintenance, the pigment will gradually fade over time, requiring more frequent visits to keep them looking their best.
Common Mistakes To Avoid
While ombre brows offer a stunning, long-lasting solution for brow enhancement, several common mistakes can affect the final outcome.
1. Neglecting The Consultation
Skipping the consultation can result in misunderstandings about your desired brow shape and colour. The consultation ensures the technician knows your preferences and can create a look that complements your facial structure.
2. Choosing An Unnatural Colour
Opting for a pigment far removed from your natural brow colour can lead to an unnatural look. Always consult with your technician to choose a shade that enhances your features without appearing too harsh or out of place.
3. Poor Aftercare
Failing to follow aftercare instructions can result in pigment loss or uneven healing. It’s essential to keep the area clean, dry, and free from makeup or excessive moisture during the healing phase.
4. Skipping Touch-Ups
Touch-ups are vital for maintaining the vibrancy and shape of your ombre brows. Skipping these sessions can lead to uneven fading and less defined brows.
5. Expecting Instant Results
Your brows will appear darker and more intense immediately after the procedure. Be patient—the colour will soften as your skin heals, and the final look will be more natural.
Conclusion
Achieving perfect ombre eyebrows requires a combination of careful planning, expert technique, and diligent aftercare. By selecting an experienced technician, ensuring proper mapping and pigment selection, and following the precise ombre application method, you can enjoy beautifully defined brows that complement your natural features.
Proper aftercare and regular touch-ups are essential for maintaining the longevity and vibrancy of your ombre brows, ensuring they remain flawless and fade evenly over time. With these tips and guidance, you can confidently enjoy long-lasting, stunning ombre brows that enhance your beauty without the need for daily makeup.
FAQs About Eyebrows
Can Ombre Eyebrows Be Customised To Individual Preferences?
Yes, ombre eyebrows are fully customisable, allowing for adjustments in shape, colour, and gradient intensity to suit each individual’s facial features and personal style.
What Is The Step-By-Step Process For Achieving Perfect Ombre Eyebrows?
The process includes consultation and mapping, numbing and pigment application, healing and aftercare, and touch-up sessions for maintaining the intensity and precision of the ombre brows.
How Should One Maintain Ombre Eyebrows To Keep Them Looking Perfect?
Maintenance tips include gentle washing, moisturising, avoiding makeup during the healing period, limiting physical activity and sun exposure, and scheduling regular touch-up sessions.
What Are Some Common Mistakes To Avoid When Getting Ombre Eyebrows?
Common mistakes include insufficient research when choosing an artist, neglecting the consultation process, having unrealistic expectations, improper aftercare, skipping necessary touch-ups, choosing an unnatural colour, and disregarding professional advice.
Is The Long-Term Commitment To Ombre Powder Brows Worth It For Celebrities?
Ombre powder brows are a semi-permanent procedure, so it’s essential to consider the long-term commitment. Celebrities must weigh the benefits against their preferences for style changes and maintenance routines before making a decision.
