
Are you considering enhancing your brows with microblading but need clarification? Wondering, "Do you offer a consultation before the microblading session?"
Look no further! At our premier beauty studio, we understand the importance of ensuring our clients feel confident and informed before undergoing any cosmetic procedure.
Our dedicated team is committed to providing a personalized experience, starting with a thorough consultation to address your needs and concerns. During this initial meeting, we'll discuss the microblading process in detail, answer any questions, and work collaboratively to design the perfect brow shape for you.
Our goal is to make you feel comfortable and well-informed so you can confidently approach your microblading session, knowing you're in expert hands.
Experience the artistry of microblading with the added assurance of a comprehensive consultation tailored to your individual preferences and style.
Consultation For Microblading
This Procedure Is Not Appropriate For You If:
- Even with a parent's consent, you're not old enough to legally drive a car.
- You intend to become a mother.
- Kalloid scars are possible for you.
- If you suffer from a bleeding disorder or are using a blood-thinning medication (e.g., Coumadin, ibuprofen, the medicine Aleve, vitamin E from fish oils, etc.)
- Due to your autoimmune illness, you may be more susceptible to infections and have slower healing times.
- We need a general doctor's note to certify your eligibility if you've been having radiation or chemotherapy within the last six months.
- Within one year of the operation, you have been taking Accutane.
If you are at a higher risk of infection or have poor healing after microblading, it is advised that you not have the procedure. Get the OK from your doctor beforehand. A general doctor's note may be necessary to confirm eligibility in certain cases:
- Experiencing brow-area dermatitis or eczema
- Skin growths on or around the forehead, such as moles
- People with diabetes
- Heart problem that is not normal
- Transplantation of organs
- Or if you have a medical condition that makes you more likely to bleed, get an infection, or have your wounds heal more slowly than usual.
Medications That Affect Treatment And Healing
- Medications for the thyroid (colour fades faster)
- Blood hypertension and cholesterol meds (excessive hair thinning)
Other Factors That Influence Healing
- Mezzo therapy, laser treatments, microdermabrasion, chemical peels, and fruit acids
- Thickening agents include retinoids (vitamin A), glycolic acid (lactic acid), or a combination. You must stop using it seven days before your treatment and stay away from the treated area for thirty days while it heals.
- Premature fading can occur by using too much face powder and active components in creams (anti-aging, etc.).
- Your brows will fade faster if exposed to sunlight, light treatment, ultraviolet rays from tanning chairs, solariums for growing lasers, or powerful pulse light therapy. Once they've healed, be sure to apply sunscreen regularly.
- Scars: Pigment retention is more challenging in areas with scars. Notably, microblading is only compatible with flat scars and cannot be applied to elevated scars.
Microblading Safety Concerns
- The number of factors that affect a client's colour retention is quite variable. Thus, for first-time clients, microblading usually entails two steps. At the client's expense, getting the results required for clients with problematic skin types may take more than one session.
- Because your skin's protective barrier is compromised during microblading, the risk of infection is higher. If you want to avoid infections and get the best possible healing results after an operation, follow the aftercare instructions in the letter.
- It is recommended that a licenced professional remove your eyebrow tattoo using a laser or saline if you are unhappy with it for any reason. The client will be responsible for the cost of the procedure. This may happen at any facility that offers permanent makeup. You can also keep applying makeup and forego the permanent cosmetic procedure. Six Sigma Brows does not provide a money-back guarantee and makes no promises about how your brows will heal.
What You Should Know Before the Procedure
- For the full 24 hours leading up to the surgery, abstain from coffee and alcohol to reduce bleeding.
- Within 48 to 72 hours before your procedure, refrain from taking Advil or any blood-thinning medication, including aspirin, niacin, vitamin E, or ibuprofen. However, if you have a low pain threshold, you can take extra-strength Tylenol.
- Avoid strenuous physical activity for at least ten days following the operation and not on the day of the procedure itself.
- Wait six days before the surgery to wax or colour your brows.
- Before the procedure, avoid exfoliating your skin in any way, including with a chemical peel, laser, etc.
- For the best healing outcome, make sure you stay hydrated.
- The repaired colour will look different if you've just had a tan.
- Scar tissue has grown in the treated area after laser removal or other procedures, which can compromise the final product.
- If you want your skin to absorb the colour, you should have treatments.
- A three-week window either before or after the operation is ideal for Botox injections.
- Periods make people more sensitive, so keep that in mind.
What To Expect On The Procedure Day
The outcomes are typically achieved after two consultations. The first consultation is all about the blueprints, the design, and the construction of the hair strokes. The second session, which should be scheduled 30–60 days after the first, assesses the skin's reaction to the pigment and touches up any faded strokes for an even more flawless outcome.
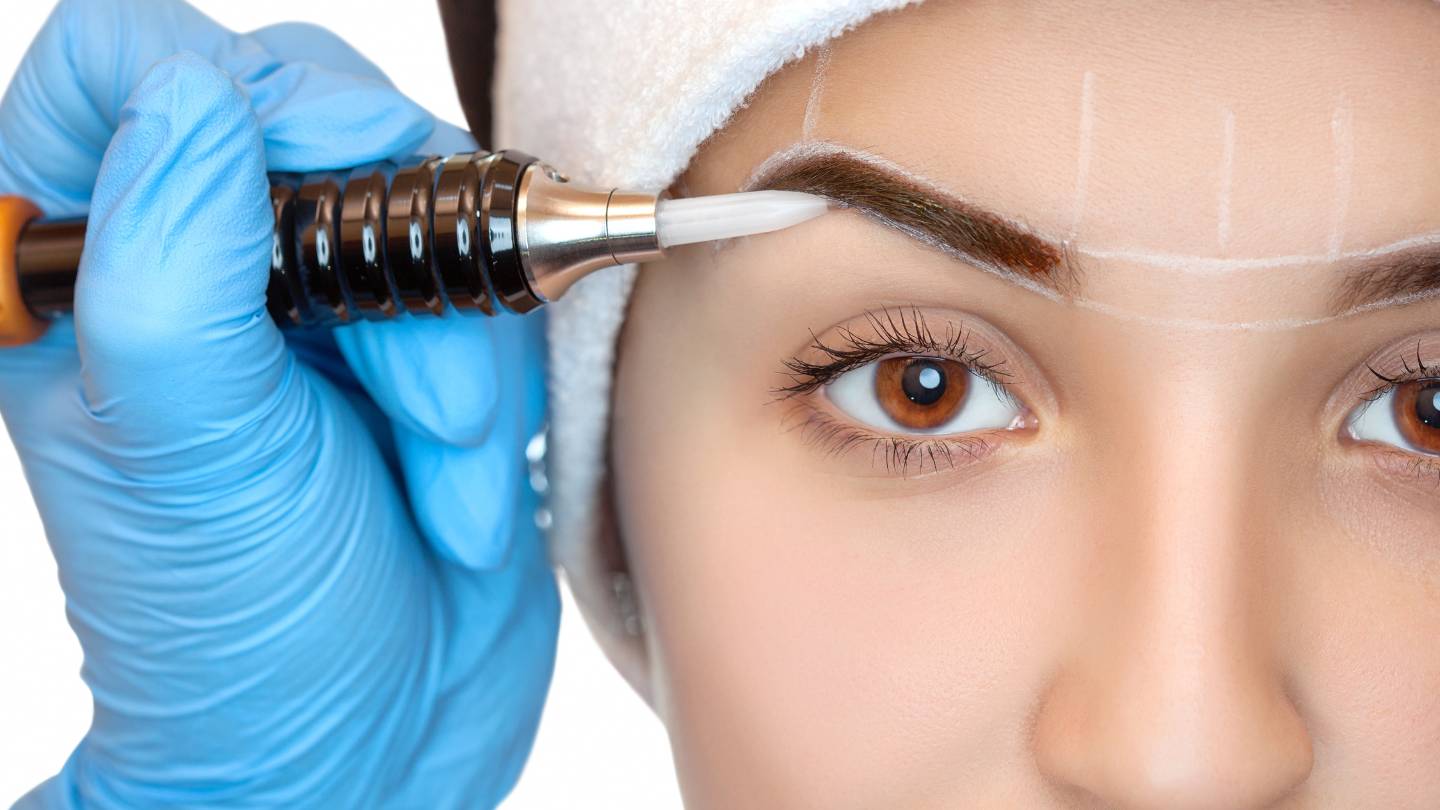
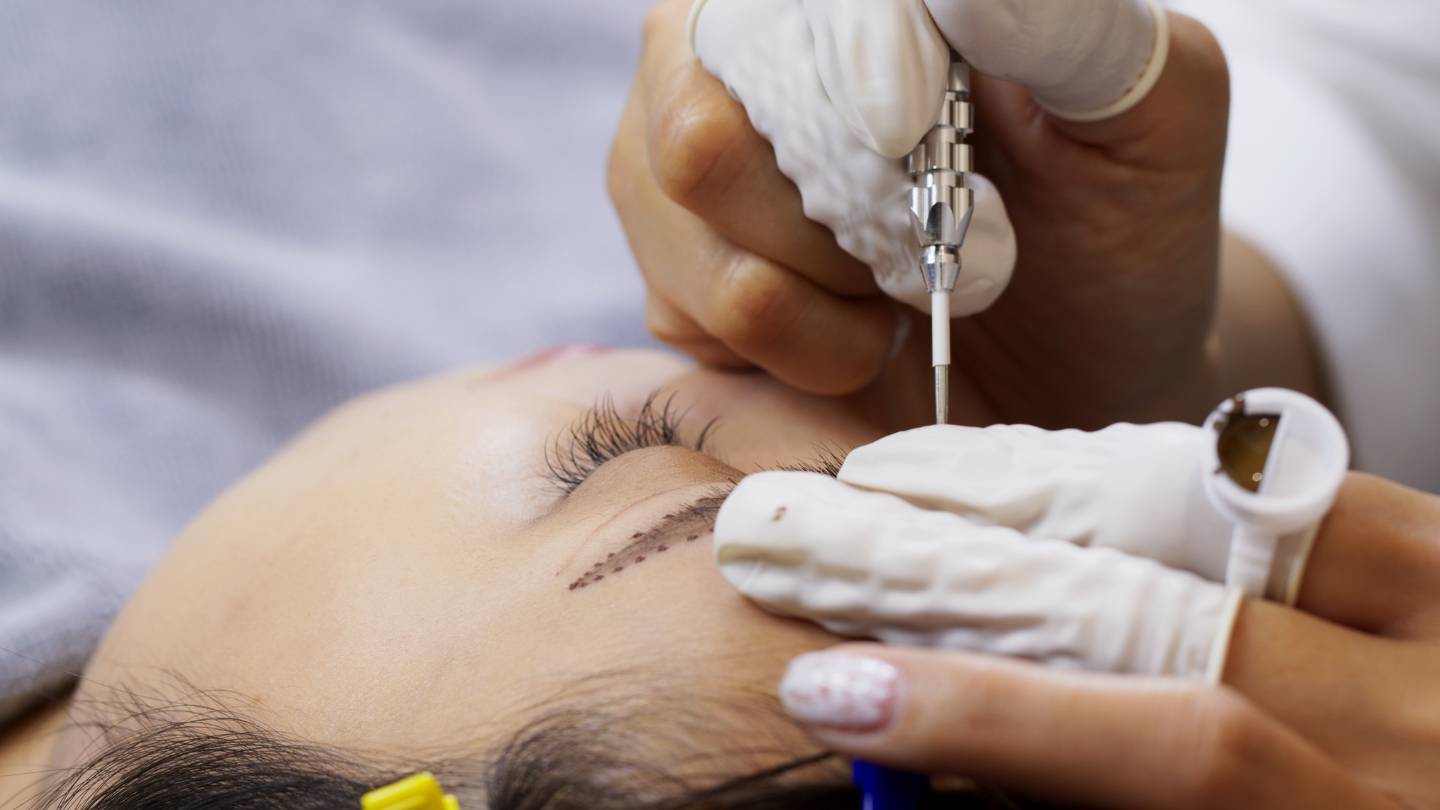
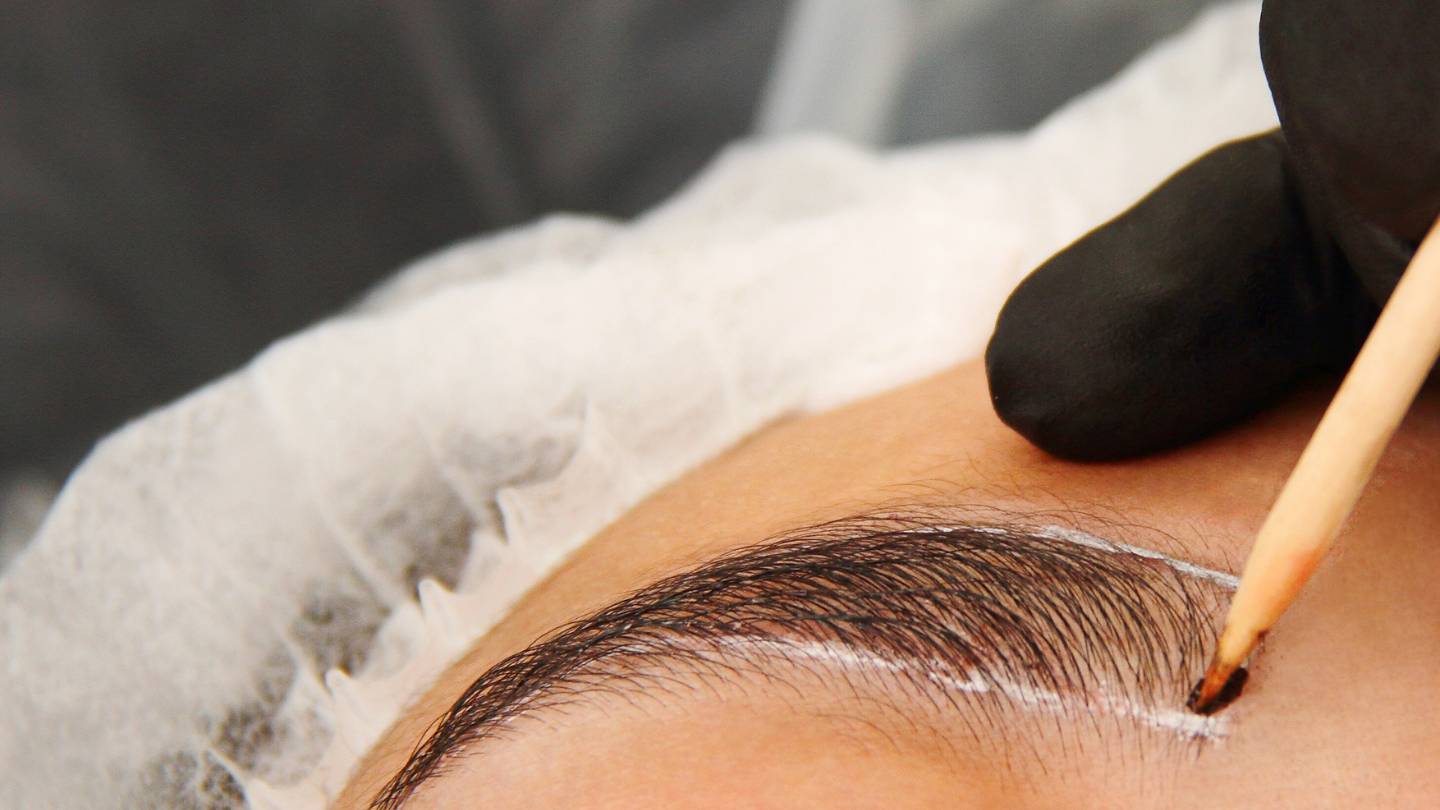
Brow mapping is the initial phase, and it entails using a calliper to measure six locations on the brows by your inherent face characteristics. Aim for a more balanced and symmetrical appearance with your brows. Before your artist starts microblading, you will get a chance to inspect the revised shape and give your approval after the pencil outline is complete.
For optimal colour retention and clean strokes, the artist will do the initial pass of the brows without numbing. The artist will apply Ultra Duration numbing liquid after the initial pass to help alleviate discomfort during the remainder of the treatment.
Although it is common practice to numb the area before microblading, Six Sigma Brows does not because research has demonstrated that doing so reduces colour retention and stroke sharpness. Nevertheless, you are free to use Pre-Numbing in your recipe; just be aware that it may impact retention.
You will return for the second session, known as the perfecting session, anywhere from thirty to sixty days after your first appointment. To produce fuller, more symmetrical brows, the second session is to touch up faded strokes and make any required corrections.
What To Expect Following The Procedure
Darker, bolder, and more precisely defined brows are the immediate results of brow surgery. You could be self-conscious about how thick and dark your brows are. As the surface ink dries and flakes form, your brows will look even thicker and darker for the next two to three days.
The flakes will fall off on their own. Avoid peeling or picking. The flaking of the brows can last for a maximum of fourteen days. Flaking is normal; however, following the aftercare instructions will make it less noticeable. As you heal, your brows gradually lighten in colour, thin out, and look more natural. Stick with it!
After the procedure, you must wait ten days before getting the region wet or applying products except the prescribed ointment. Wait to touch the area with makeup for at least two weeks. After 30 days, your brows should be completely healed. You should avoid direct sunlight and apply sunscreen to keep them protected.
What Is The Average Time For A Microblading Session?
If you've ever wanted to know, microblading is quick and easy. The full effects, however, will be visible once you commit to both treatment sessions, spaced four to eight weeks apart.
Choosing the perfect shade and meticulously shaping and drawing your brows to achieve the most symmetrical look takes up most of your two- or three-hour first appointment.
The second session will be shorter. Since this is merely a touch-up, it should take approximately 1.5 to 2 hours. Due to individual differences in healing time, you must return for a follow-up consultation to assess your progress and how much your skin absorbs the pigment.
To ensure the final shape is balanced and looks natural, we can use the second appointment to add extra brushstrokes or touch up the edges if you choose.
Treatment Process
There is no complexity or difficulty to this procedure. In technical terms, it's a hand-held gadget that applies semi-permanent pigment to the skin.
When compared to eyebrow tattooing, this technique differs in that the pigment is placed relatively superficially on the skin rather than deeply. Because of its cutting-edge technology can mimic the appearance of real brow hairs down to the smallest detail, including the colour and the feather-light stroke.
One of this procedure's main draws is its subtlety and softness, especially when contrasted with the boldness of conventional eyebrow tattooing. Additionally, no ink is used in this method.
It employs marginally distinct pigments. Indeed, pigments are engineered to fade with time, creating a more natural appearance progressively. It also gives our brow artists the freedom to work their magic, making delicate adjustments that bring out your face's inherent beauty.
Recovery Process
After the first treatment, there will be a little recuperation period, but you should start feeling better quickly. Following their initial appointment, most of our patients can resume their normal activities without delay. After the first week, though, you may notice that the colour is starting to fade; it will appear darker and gradually become more subtle and natural.
Exfoliation happens around seven to 10 days following the initial therapy. This means your skin's outer layer will gradually flake and peel away, revealing your lighter, softer skin beneath. A little itching may also occur while the wound heals.
Immediate Recovery Following Treatment
There is a critical window of opportunity immediately following your session. Applying a specific ointment every two or three hours prevents the treatment area from drying. Except for the specific ointment we provide, you should refrain from applying any other cosmetics, skincare products, or creams on your face.
It would help if you also refrained from sweating or getting the region wet. This aids in maintaining proper healing of the treated area. Refrain from touching or picking at the healing region, no matter the temptation's strength. Touching the region can hasten the pigment's fading. To keep the benefits strong, follow all your post-treatment instructions in the letter.
Conclusion
The beauty studio at Six Sigma Brows offers a consultation before a microblading session to ensure clients feel confident and informed about the procedure. The consultation covers the microblading process, answering questions, and designing the perfect brow shape. However, the procedure is not suitable for those with certain medical conditions, such as being not old enough to legally drive a car, intending to become a mother, having kalloid scars, having a bleeding disorder, or using blood-thinning medications.
Medications that affect treatment and healing include thyroid medications, blood hypertension, and cholesterol medications. Other factors influencing healing include mezzo therapy, laser treatments, microdermabrasion, chemical peels, and fruit acids. Thickening agents like retinoids and glycolic acid must be stopped seven days before the procedure and stay away from the treated area for thirty days.
Microblading is only compatible with flat scars and cannot be applied to elevated scars. Safety concerns include the compromised skin's protective barrier during microblading, increasing the risk of infection. To avoid infections and achieve the best healing results, clients should follow aftercare instructions and wait six days before waxing or coloring their brows.
Before the procedure, abstain from coffee and alcohol, refrain from taking blood-thinning medications, avoid strenuous physical activity, wait six days before waxing or coloring, avoid exfoliating the skin, stay hydrated, and avoid treatments that may compromise the final product. A three-week window is ideal for Botox injections, as individuals may be more sensitive during certain periods.
Six Sigma Brows is a unique eyebrow surgery procedure that involves two consultations to achieve the desired results. The first consultation involves blueprinting, design, and construction of hair strokes, while the second session, called the perfecting session, assesses the skin's reaction to the pigment and touches up faded strokes for a more flawless outcome.
The initial phase involves brow mapping and pencil outline creation, with the artist applying Ultra Duration numbing liquid after the initial pass for optimal color retention and clean strokes. The second session, known as the perfecting session, is scheduled 30-60 days after the first appointment to touch up faded strokes and make any necessary corrections.
After the procedure, the brows will appear darker, bolder, and more precisely defined. The process takes about two to three days, with flakes falling off on their own and flaking lasting up to fourteen days. After 30 days, the brows should be completely healed, and it is important to avoid direct sunlight and apply sunscreen.
The treatment process is simple and easy, with the pigment applied superficially rather than deeply, mimicking the appearance of real brow hairs. It uses marginally distinct pigments that fade over time, creating a more natural appearance.
After the first treatment, there is a brief recuperation period, but most patients can resume normal activities without delay. Exfoliation occurs around seven to 10 days after the initial therapy, revealing lighter, softer skin beneath.
Immediate recovery following the treatment involves applying a specific ointment every two or three hours, refraining from other cosmetics, skincare products, or creams, and following post-treatment instructions to maintain the benefits.
Content Summary
- Are you considering enhancing your brows with microblading but need clarification?
- Wondering, "Do you offer a consultation before the microblading session?"
- At our premier beauty studio, we understand the importance of ensuring our clients feel confident and informed.
- Our dedicated team is committed to providing a personalized experience.
- Thorough consultation to address your needs and concerns.
- Discuss the microblading process in detail during the initial meeting.
- Answer any questions and work collaboratively to design the perfect brow shape for you.
- Goal is to make you feel comfortable and well-informed.
- Approach your microblading session confidently, knowing you're in expert hands.
- Experience the artistry of microblading with the added assurance of a comprehensive consultation.
- Microblading may not be appropriate if you're not old enough to legally drive a car.
- It's not suitable if you intend to become a mother.
- Kalloid scars are possible for some individuals.
- Bleeding disorders or blood-thinning medications may make the procedure unsuitable.
- Autoimmune illness may increase susceptibility to infections and slow healing times.
- General doctor's note required for eligibility after radiation or chemotherapy within the last six months.
- Accutane use within one year of the operation is a contraindication.
- Higher infection risk or poor healing may advise against the procedure.
- Consultation recommended for those with brow-area dermatitis, eczema, skin growths, diabetes, heart problems, organ transplants, or other medical conditions.
- Medications for thyroid, blood pressure, and cholesterol can affect treatment and healing.
- Mezzo therapy, laser treatments, and certain chemicals can influence healing.
- Thickening agents must be avoided before treatment for optimal results.
- Premature fading can occur with excessive use of face powder and active components in creams.
- Sunlight, light treatments, and UV rays can affect healed brows, so regular sunscreen application is advised.
- Microblading is only compatible with flat scars, not elevated ones.
- Colour retention variability for clients; first-time clients may require more than one session.
- Microblading entails two steps for first-time clients.
- Risk of infection is higher due to compromised skin barrier during microblading.
- Aftercare instructions are crucial for infection prevention and optimal healing.
- Licensed professional recommended for tattoo removal if unhappy, client responsible for cost.
- Avoid coffee and alcohol 24 hours before microblading to reduce bleeding.
- Refrain from blood-thinning medications 48-72 hours before the procedure.
- Avoid strenuous physical activity for ten days post-operation.
- Wait six days before waxing or coloring brows.
- Avoid skin exfoliation before the procedure for best healing.
- Stay hydrated for optimal healing.
- Repaired colour may look different after a tan.
- Scar tissue from laser removal may compromise the final microblading outcome.
- Treatments are recommended for skin absorption of colour.
- Botox injections ideally done three weeks before or after microblading.
- Periods can make individuals more sensitive, so consider timing.
- Outcome achieved after two consultations, with the second session 30-60 days after the first.
- Brow mapping measures six locations on brows for a balanced appearance.
- Initial pass done without numbing for optimal colour retention.
- Ultra Duration numbing liquid applied after the initial pass.
- Second session, known as the perfecting session, done 30-60 days after the first.
- Immediately darker, bolder, and more defined brows after the procedure.
- Flaking occurs over 14 days, normal but less noticeable with aftercare.
- Direct sunlight should be avoided, and sunscreen applied after 30 days for protection.
- Microblading is quick and easy, with full effects visible after both treatment sessions spaced four to eight weeks apart.
Frequently Asked Questions
During the consultation, we will discuss your desired eyebrow shape, colour preferences, and overall expectations. We'll also explain the microblading process, discuss aftercare instructions, and answer any questions.
Yes, our consultations are complimentary. Clients need to clearly understand the microblading process and feel comfortable before proceeding with the actual procedure.
Typically, the consultation takes around 15 to 30 minutes. This allows us enough time to thoroughly discuss your preferences, explain the procedure, and ensure you feel confident about moving forward.
Absolutely! We encourage clients to browse through our portfolio of before-and-after photos during the consultation. This will give you a better idea of our style and the quality of our microblading work.
Please bring any reference photos of eyebrow shapes or styles you like. Additionally, if you have any specific concerns or questions, please jot them down to discuss during the consultation.