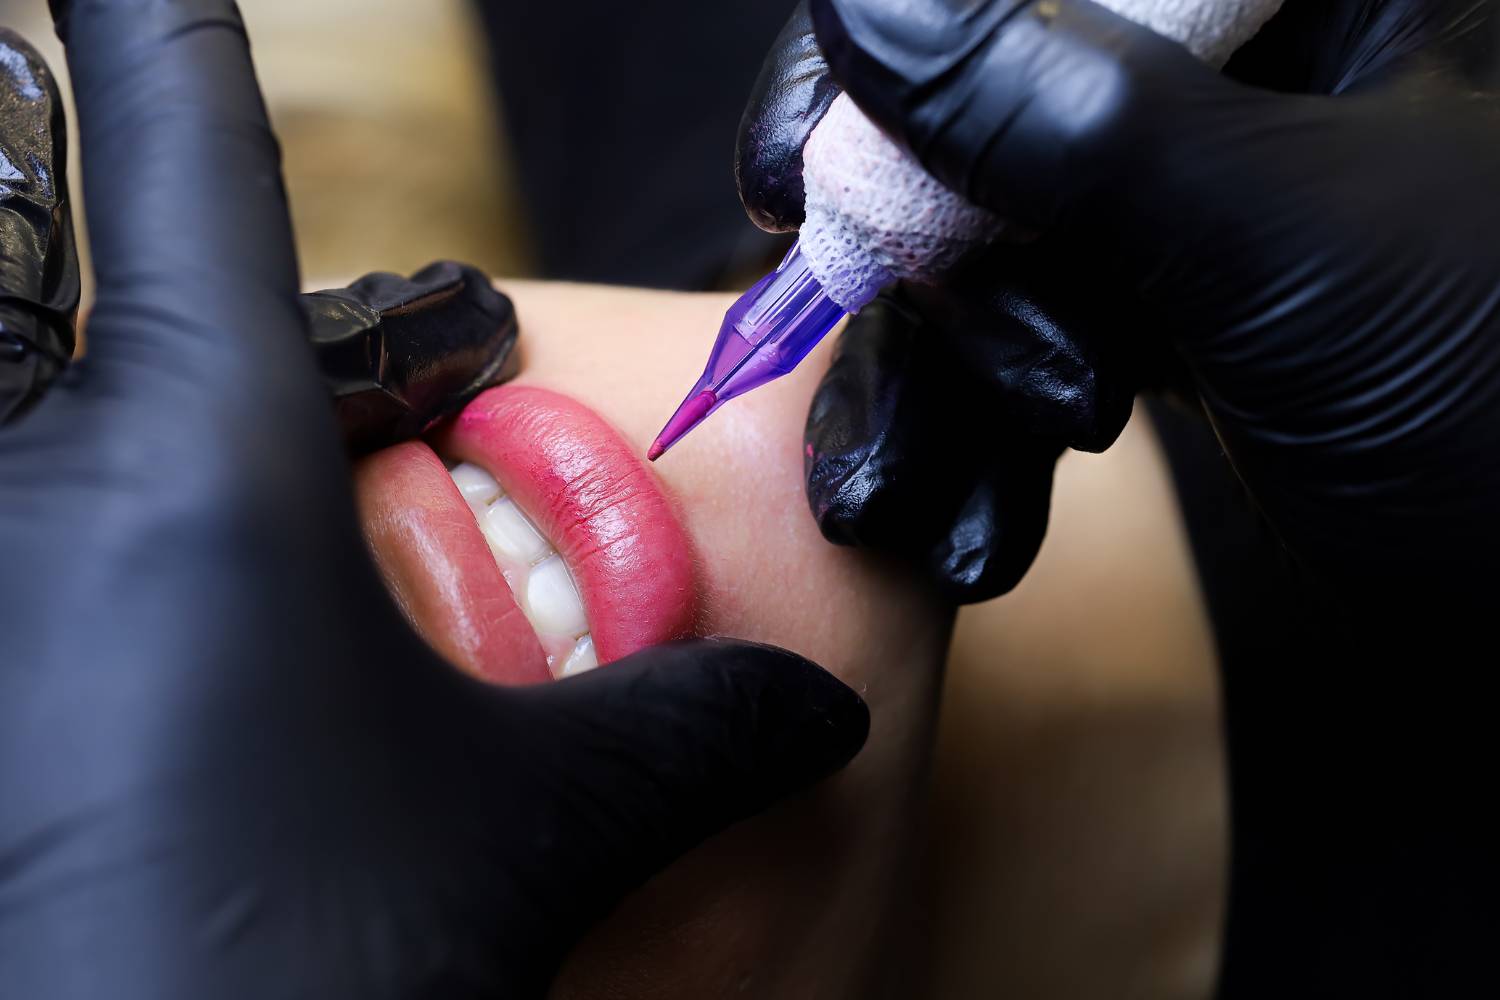
Lip blush tattooing has become a popular semi-permanent makeup technique that enhances lips’ natural colour, shape, and definition. It offers a subtle, long-lasting result that eliminates the need for daily lip liner or lipstick application.
Before undergoing a lip blush tattoo, following specific guidelines, such as exfoliating and hydrating the lips to create a smooth, even surface, is important. Avoiding certain medications, caffeine, and alcohol in the days leading up to the procedure helps minimise swelling and bleeding.
After the treatment, post-care instructions such as applying recommended ointments, avoiding hot and spicy foods, and staying away from direct sun exposure are critical for proper healing. Following these guidelines diligently will preserve the colour and longevity of the lip blush tattoo and prevent potential complications like infections or pigment fading.
Let’s Get Straight To The Point
Proper preparation and diligent aftercare are key to achieving the best results from a lip blush tattoo. Before the procedure, hydrate, moisturise, and exfoliate your lips while avoiding caffeine, alcohol, and certain medications. Sun protection and communication with your artist about design and colour are also important.
After the tattoo, apply recommended ointments, avoid sun exposure and spicy foods, and pick at scabs. Post-healing, moisturise, use SPF, stay hydrated, and schedule touch-ups to maintain vibrant, long-lasting colours. Preparation, aftercare, and artist guidance ensure a successful outcome.
Preparation Before Your Lip Blush Tattoo Session
Proper preparation is essential to achieving the finest possible outcome for your lip blush tattoo. This section will guide you through what you must do before entering the tattoo studio.
1. Confirming Your Appointment And Preparing Mentally
Make sure the date and time of your session are confirmed with the tattoo studio. Arrive punctually to avoid unnecessary stress.A lip blush tattoo is a semi-permanent procedure. It’s natural to feel a mix of excitement and anxiety. Remind yourself of why you’re doing it and what outcome you’re expecting.
2. Finalising Design And Colour Choices
Ensure you’ve had a thorough discussion with your tattoo artist regarding the design and colour. Consider factors like your skin tone, lip shape, and preferences.Consider the artist’s recommendations, as they can suggest the most suitable shades and techniques for your specific lip structure.
3. Avoiding Caffeine And Alcohol
Avoid consuming caffeine or alcohol in the 24 hours before your appointment, as both can cause blood thinning and increased bleeding during the procedure. This may affect the tattoo’s outcome.
4. Stay Hydrated And Rested
Drink plenty of water before the session to keep your skin hydrated. Healthy, hydrated skin helps with the retention of pigment.Make sure you have a restful night’s sleep before your session to be relaxed and fully prepared.
5. Lip Care
Use a hydrating lip balm to keep your lips moisturised. Avoid any harsh exfoliants or lip plumpers in the days prior, as they may irritate the skin.
Two To Three Weeks Before The Lip Blush Tattoo Appointment
During the 2-3 weeks before your appointment, it’s important to focus on maintaining the health of your lips and overall skin.
1. Hydrate Continuously
Begin hydrating your lips well in advance. Proper hydration contributes to better tattoo retention and colour saturation.Drinking water ensures that your lips are moisturised from the inside, improving the overall health of your skin.
2. Sun Protection
Protect your lips from sun damage using lip balms with SPF. Sunburnt lips can hinder the tattoo process and result in uneven pigment retention.
3. Avoid Chemical Exfoliants
Avoid chemical exfoliants or harsh lip scrubs that irritate your lips. Use gentle methods, like a soft toothbrush, to remove any dry skin.
4. Maintain A Healthy Diet
Consume a balanced diet of fruits, vegetables, and other foods high in vitamins and antioxidants, nuts, which can aid skin health and recovery post-tattoo.
5. Avoid Lip Fillers
If you’re considering lip fillers, wait until after your lip blush tattoo has healed. Fillers can alter the shape of your lips and affect the tattoo’s outcome.
6. Communication With Your Artist
Contact your tattoo artist for any questions or concerns. Clarify any aftercare instructions before the day of the procedure.
One Week Before Your Lip Blush Tattoo Appointment
As the appointment date approaches, here are key actions to take during the week leading up to your lip blush tattoo:
1. Regular Lip Moisturisation
Use nourishing lip balm to ensure your lips are well-hydrated and smooth before the tattoo session.
2. Avoid Harsh Exfoliants
Avoid harsh exfoliation methods that could irritate your lips before the procedure.
3. Confirm Design And Colour Choices
Double-check your design and colour choices with your artist, ensuring you’re aligned on the final look.
4. Limit Caffeine And Alcohol
Keep your caffeine and alcohol intake to a minimum the week before your appointment, as they may cause dehydration or increase sensitivity.
5. Rest And Relax
Ensure you’re well-rested and relaxed, making the process smoother for you and your artist.
One To Three Days Before The Lip Blush Tattoo Procedure
In the final days before your appointment, fine-tuning your preparation is critical to ensuring the best results.
1. Gentle Exfoliation (If Necessary)
Use a gentle exfoliation method if your lips have flaky skin. Avoid harsh treatments that might irritate you.
2. Continue Hydration
Keep your water intake high to maintain lip hydration.
3. Avoid Sun Exposure
Prevent sunburn by applying SPF lip balm and avoiding direct sunlight.
4. Confirm Appointment Details
Ensure you’ve confirmed your appointment time and any final instructions with your tattoo artist.
5. Mental Preparation
Take time to mentally prepare, ensuring you feel comfortable and ready for the experience.
Aftercare Following Your Lip Blush Tattoo
The aftercare process is vital for ensuring your lip blush tattoo’s long-term success and vibrancy. Proper healing is necessary to avoid infections and maintain the tattoo’s quality.
1. Post-Treatment Cleaning Protocol
Proper cleaning prevents infections and aids recovery. Here’s how to cleanse your lips effectively:
- Wash Hands: Always clean your hands with fragrance-free soap before touching your lips.
- Use a Saline Solution: Dampen a cotton pad with a mild saline solution or a cleanser your artist recommends.
- Gently Cleanse: Dab the tattooed area lightly, avoiding rubbing or scrubbing the skin.
- Air Dry: Let your lips air dry, or gently pat them with a soft towel.
2. Activities To Avoid Post-Treatment
Certain actions should be avoided post-procedure to ensure optimal healing:
- Avoid Lip Products: Steer clear of moisturisers or lip balms not prescribed by your artist.
- No Lipstick or Makeup: Avoid applying cosmetics to the lips until fully healed.
- Stay Out of the Sun: Protect your lips from direct sunlight, as UV exposure can cause fading.
- Don’t Pick or Scratch: Avoid picking at flakes or scabs, as this can cause pigment loss and increase the risk of infection.
- Avoid Spicy or Hot Foods: Avoid foods and drinks that irritate your lips.
Handling Your Lip Blush Tattoo After Healing
Once your lips have fully healed, ongoing care is important to maintain the appearance of your lip blush tattoo.
1. Moisturisation
Keep your lips moisturised even after they’ve healed to prevent dryness and maintain a supple texture.
2. Sun Protection
Apply an SPF-containing lip balm to shield your lips from the sun’s rays. Which can cause the tattoo to fade.
3. Hydration
Keep up with your water intake to maintain overall skin health, which includes your lips.
4. Touch-Up Appointments
Over time, your lip blush tattoo may fade slightly. Make time for touch-up appointments with your tattoo artist to keep the colour vibrant.
5. Healthy Lifestyle
A healthy lifestyle contributes to the longevity of your tattoo. Maintain a balanced diet and keep up with your skincare routine.
Conclusion
Achieving optimal lip blush tattoo results involves a comprehensive approach that starts before the procedure and continues through post-treatment care. By following these preparation and aftercare guidelines, you can ensure the vibrant, long-lasting colour you desire.
Hydration, sun protection, and communication with your tattoo artist play essential roles in the overall success of your lip blush tattoo. Through careful attention to each step, from booking your appointment to aftercare, you’ll enjoy beautiful, vibrant lips for the long term.
FAQs About Lip Tattoo
What Is A Lip Tattoo, And How Does It Differ From Traditional Lip Makeup?
A lip tattoo, also known as a lip blush tattoo or permanent lip makeup, involves depositing pigment into the lips’ skin to enhance their colour and shape semi-permanently. Unlike traditional lip makeup such as lipstick or lip liner, which requires daily application and may smudge or fade throughout the day, a lip tattoo offers long-lasting results.
How Long Does A Lip Tattoo Last, And Does It Require Touch-Ups?
The longevity of a lip tattoo varies from person to person but typically lasts between 1 to 3 years. Factors such as skin type, lifestyle, and exposure to sunlight can affect how quickly the pigment fades. Touch-up appointments are recommended every 1 to 2 years to maintain the tattoo’s vibrancy and shape.
Is Getting A Lip Tattoo Painful?
The level of discomfort experienced during a lip tattoo procedure varies depending on individual pain tolerance. Some people may find the sensation uncomfortable, similar to a vibrating or scratching feeling, while others may experience minimal discomfort. Topical numbing creams are often applied before the procedure to minimise any potential pain.
Are There Any Risks Or Side Effects Associated With Lip Tattoos?
Like any cosmetic procedure, lip tattoos carry some risks and potential side effects. These may include temporary swelling, bruising, or redness immediately after the procedure, which usually subsides within a few days. In rare cases, complications such as infection, allergic reactions, or uneven pigment distribution may occur.
Can Anyone Get A Lip Tattoo, And Are There Any Factors That May Make Someone Unsuitable For The Procedure?
While lip tattoos are generally safe for most individuals, certain factors may make someone unsuitable for the procedure. Pregnant or breastfeeding women are typically advised against getting a lip tattoo due to potential risks to the baby. Individuals with certain medical conditions or skin sensitivities may also be advised to avoid lip tattoos. It’s essential to consult with a qualified tattoo artist or dermatologist to determine if a lip tattoo is suitable for you.
