Microblading has become a popular solution for those seeking well-defined, fuller, and natural-looking eyebrows. As a semi-permanent cosmetic tattooing technique, microblading creates the illusion of perfect brows without the need for daily makeup application.
It offers individuals the opportunity to wake up every day with beautifully shaped brows, saving time and effort while boosting confidence. In this comprehensive guide, we will explore everything you need to know about microblading.
From understanding the procedure to the essential aftercare, this article will provide you with all the information you need to make an informed decision about whether microblading is right for you.
Let’s get straight to the point
Microblading is a semi-permanent tattooing technique for enhancing eyebrows by creating natural-looking, fuller brows. It’s ideal for those seeking to save time on daily makeup routines, as it lasts up to 18 months.
The process involves etching pigment into the skin with fine hair-like strokes, offering a long-lasting, natural appearance. Before undergoing microblading, it’s crucial to research certified technicians and be mindful of skin sensitivity.
Benefits include time-saving, long-lasting results, and boosted confidence. The procedure starts with a consultation, numbing the area, and then the microblading itself.
Proper aftercare, such as avoiding water and following the technician’s instructions, ensures the best healing and results. While generally safe, potential risks like infection, allergic reactions, or uneven pigment may occur.
Compared to other techniques like eyebrow tattooing, tinting, or lamination, microblading offers a more natural and semi-permanent solution.
What Is Microblading?
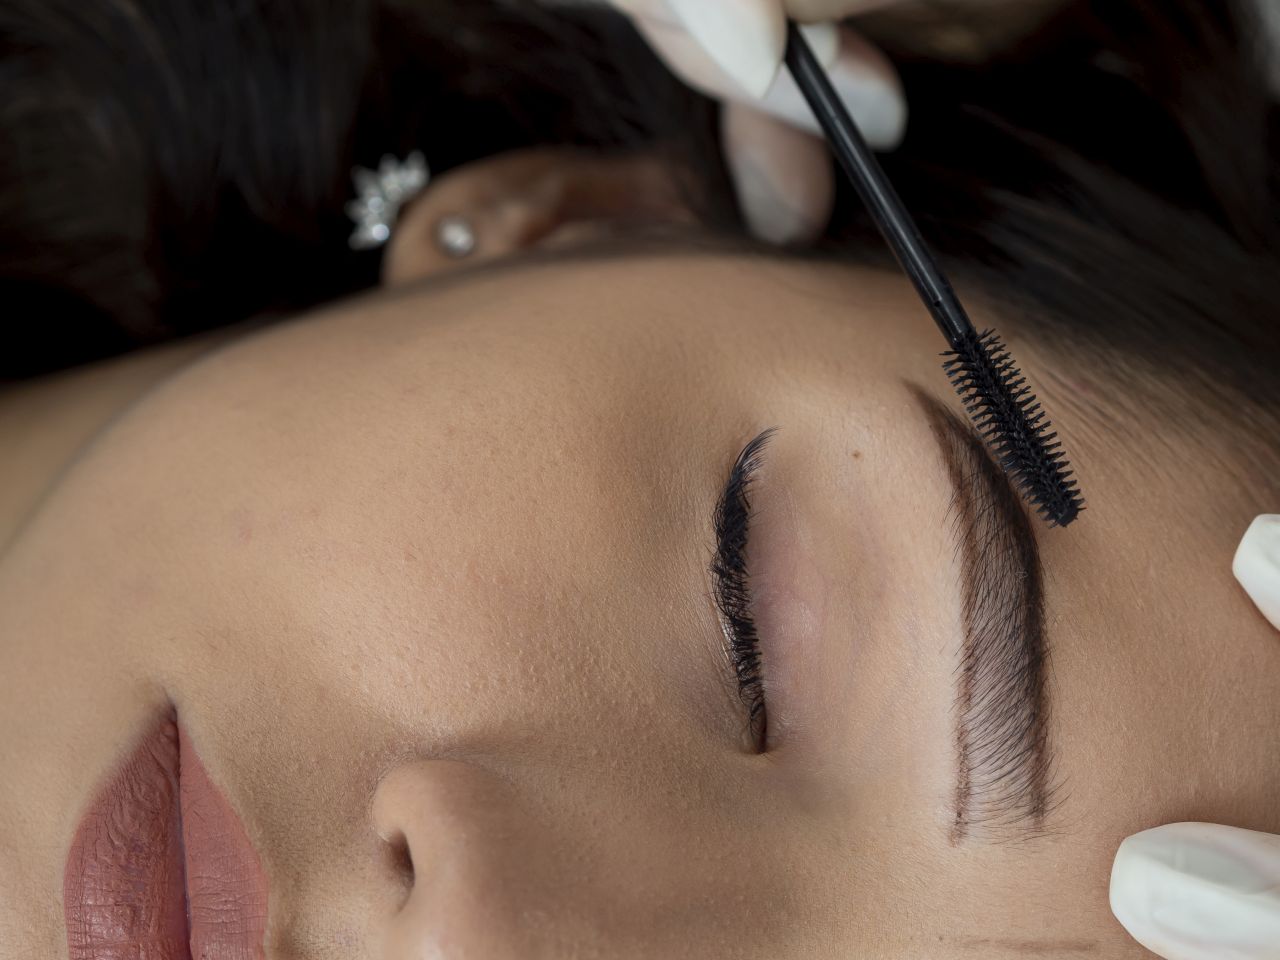
Microblading is a technique that involves the use of a fine blade to deposit pigment under the skin in hair-like strokes. Unlike traditional tattooing, the strokes are much finer and mimic the appearance of real eyebrow hairs. The result is a set of natural-looking brows that last for months without fading or smudging. Typically, a microblading session takes between one and two hours, but the results can last up to 18 months, depending on skin type and aftercare.
Key Considerations Before Microblading
1. Researching the Technician
One of the most important steps before booking a microblading appointment is researching the technician. This is not a procedure to trust to just anyone. Look for certified and experienced professionals who have a proven track record of successful microblading procedures. Check online reviews, and if possible, ask to see a portfolio of their work. Certification and training are critical factors to ensure that the technician is up to date on techniques and hygiene standards.
2. Understanding the Process
Knowing what to expect during the microblading procedure can help alleviate anxiety. The process begins with a consultation, where the technician will discuss your desired eyebrow shape and color. After agreeing on the look, the technician will draw a template on your brows to act as a guide. Once the design is approved, they will proceed with the microblading, using a hand-held tool to etch pigment into the skin.
3. Considering Skin Sensitivity
Not everyone is a good candidate for microblading. Individuals with certain skin conditions, such as eczema, psoriasis, or dermatitis, may not heal well after the procedure. It’s also important to consider any allergies or sensitivities to pigments. A patch test can help determine whether you might have a reaction to the products used during microblading.
Benefits of Microblading
Microblading offers a range of benefits, making it an attractive option for anyone looking to enhance their brows. Below are some key advantages:
1. Time-Saving Solution
For those who spend significant time each morning shaping and filling in their eyebrows, microblading can be a game-changer. This procedure eliminates the need for daily makeup application, providing a “wake-up-ready” look. With microblading, your brows remain perfect all day, every day.
2. Long-Lasting Results
Unlike traditional eyebrow makeup, which needs to be reapplied daily, microblading provides semi-permanent results that last up to 18 months. This long-lasting effect is particularly beneficial for people with sparse or uneven brows, offering a solution that maintains its appeal over time without the need for touch-ups.
3. Natural-Looking Brows
One of the greatest benefits of microblading is the natural appearance it provides. Since the strokes mimic the look of real hairs, the brows look full and realistic, blending seamlessly with your natural brows. Microblading is a great option for anyone looking to achieve fuller, well-defined eyebrows without the harshness that can sometimes come from makeup products.
4. Boosts Confidence
Eyebrows play a crucial role in shaping and defining the face. Microblading enhances facial features, framing the eyes and giving an overall polished appearance. Many individuals report increased confidence after the procedure, as they no longer need to worry about their eyebrows smudging or fading throughout the day.
The Microblading Process
Understanding the step-by-step process of microblading can make the experience more comfortable. Here’s what you can expect during the procedure:
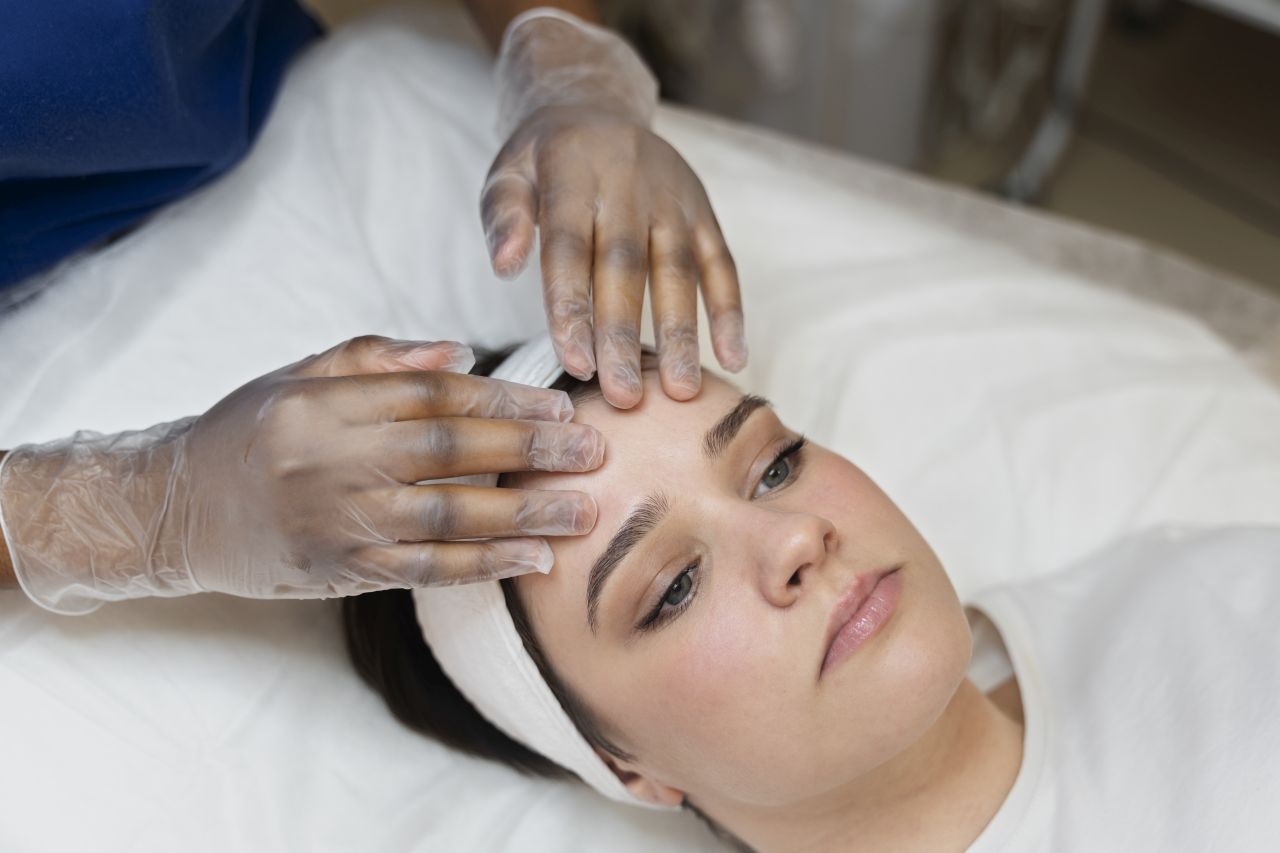
1. Consultation and Design
Before the procedure begins, your technician will consult with you to understand your preferences. They will analyze your face shape, skin tone, and natural brow hairs to design the most flattering brow shape for you. A template is then drawn on your skin to ensure the design meets your expectations.
2. Numbing the Area
To minimize any discomfort during the procedure, a numbing cream is applied to the eyebrow area. This typically takes 20-30 minutes to take effect, after which the microblading process will begin.
3. Microblading Procedure
Using a small, handheld tool with fine needles, the technician creates hair-like strokes by depositing pigment into the skin. This process can take up to two hours, depending on the complexity of the design. Throughout the session, the technician may periodically apply additional pigment to ensure the color is even.
4. Final Touches
Once the microblading is complete, the technician will show you the results and make any necessary adjustments. The brows may appear darker than expected at first, but this is normal and will fade to a more natural shade as the skin heals.
Aftercare Tips for Microblading
Proper aftercare is essential to ensure the best results from your microblading session. Following the guidelines provided by your technician will help your brows heal properly and maintain their shape and color.
1. Avoid Wetting the Brows
For the first few days after the procedure, it’s important to keep your eyebrows dry. Avoid activities that might cause sweating or exposure to water, such as swimming or exercising. Wetting the brows can cause the pigment to fade prematurely or lead to uneven healing.
2. Follow the Recommended Aftercare Routine
Your technician will provide you with a detailed aftercare routine, which may include applying an ointment to keep the skin moisturized and prevent scabbing. It’s crucial to follow these instructions closely to ensure optimal healing and results.
3. Avoid Touching or Picking at the Brows
As your brows heal, they may become itchy or begin to scab. It’s important not to touch, scratch, or pick at the area, as this can cause the pigment to become patchy and affect the final result.
4. Use Sun Protection
Exposure to the sun can cause the pigment in your brows to fade more quickly. Protect your new brows by wearing a hat or applying sunscreen once they have fully healed.
Potential Risks and Side Effects of Microblading
While microblading is generally a safe and effective procedure, it’s important to be aware of potential risks and side effects. Some common issues include:
- Infection: If proper hygiene practices are not followed, there is a risk of infection at the microblading site. Make sure to choose a reputable technician who adheres to strict cleanliness standards.
- Allergic Reactions: Some individuals may experience an allergic reaction to the pigments used in microblading. A patch test before the procedure can help prevent this.
- Uneven Pigment: In some cases, the pigment may fade unevenly, requiring touch-ups to achieve a consistent look.
Microblading vs. Other Eyebrow Enhancement Techniques
Microblading is just one of several eyebrow enhancement options available. Here’s how it compares to other popular techniques:
1. Eyebrow Tattooing
Unlike microblading, which uses fine strokes to mimic hair, eyebrow tattooing creates a more solid, filled-in look. While tattooing lasts longer than microblading, it often appears less natural due to its uniform appearance.
2. Eyebrow Tinting
Eyebrow tinting involves applying a semi-permanent dye to the brows to enhance their color and shape. While this is a less invasive option than microblading, the results are temporary, lasting only a few weeks.
3. Brow Lamination
Brow lamination is a process that sets the brow hairs in place to create a fuller look. Unlike microblading, which adds pigment to the skin, brow lamination works with your existing hair. This technique provides temporary results and requires regular maintenance.
Conclusion
Microblading is an excellent option for individuals looking to enhance their eyebrows with a long-lasting, natural look. The procedure offers numerous benefits, from saving time on daily makeup application to boosting confidence with fuller, well-defined brows. However, it’s essential to carefully research your technician and follow aftercare instructions to ensure the best possible outcome.
By understanding the process, benefits, and aftercare of microblading, you can make an informed decision about whether this procedure is right for you. With proper care, your new brows can last for months, giving you a polished, put-together look every day.
FAQs About Microblading
What Is Microblading?
Microblading is a semi-permanent tattooing technique that uses fine strokes to mimic natural eyebrow hairs, creating fuller and well-defined brows.
How Long Does A Microblading Session Take?
A typical microblading session takes 1-2 hours, including consultation, design, and the procedure itself.
How Long Do The Results Last?
Microblading results can last up to 18 months, depending on skin type and aftercare.
Is Microblading Painful?
Most technicians use numbing cream to minimize discomfort during the procedure, making it generally painless for most clients.
What Aftercare Is Needed?
Avoid wetting the brows, follow the recommended aftercare routine, and protect them from sun exposure to ensure proper healing and long-lasting results.
