Achieving the perfect eyebrow look can transform your entire appearance. You can fill in your brows with the right techniques and products for a natural, polished finish.
This guide walks you through each step, from assessing your natural shape to selecting the ideal products, ensuring your brows enhance your features beautifully. Let’s get started on creating those flawless brows!
Let’s get straight to the point
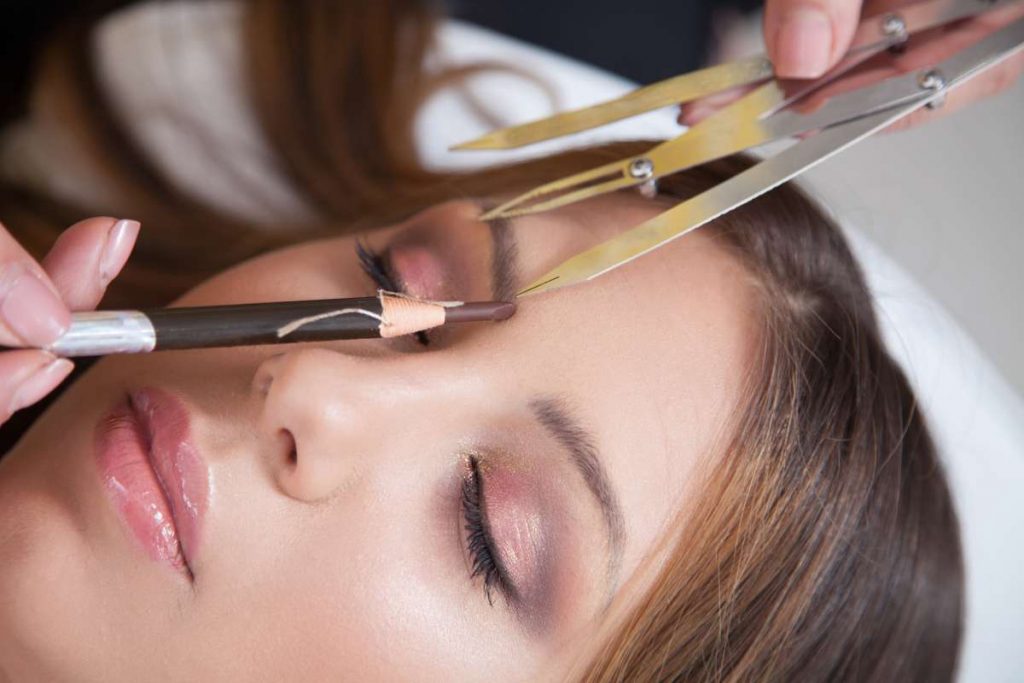
To achieve naturally filled-in eyebrows, start by assessing your natural shape and identifying where your brows should begin, arch, and end. Then, prepare your brows by brushing and cleaning up stray hairs.
Choose a brow product in a suitable shade—one to two shades lighter for dark hair and darker for light hair. Apply the product using light, feather-like strokes and blend with a spoolie for a soft finish. Finally, set your brows with a clear gel.
Practice and use a light hand for the best results, avoiding harsh lines and maintaining your brow shape regularly.

Step 1: Assess Your Natural Shape
Understanding your natural brow shape is essential for achieving a flattering look. Follow these steps to determine the best shape for your face:
Identify The Start
- Use a makeup brush to align from the outer edge of your nose to the inner corner of your eye.
- This line indicates where your brow should begin. A proper starting point ensures that your brows frame your face appropriately.
Find The Arch
- The highest point of your brow should ideally be positioned directly above the outer edge of your iris.
- This arch creates a lift in your face and enhances your eyes.
Determine The End
- Angle the brush from your nostril to the outer corner of your eye.
- This marks where your brow should end. A well-defined end point prevents brows from looking overly long or short.
Step 2: Prepare Your Brows
Preparing your brows is essential for a flawless application. Here’s how to ensure they’re ready:
Brush Downward
- Use a spoolie brush to gently brush your brow hairs downward.
- This technique reveals any sparse areas that may need filling, allowing for a more precise application.
Clean Up Strays
- Examine your brows closely for any stray hairs that fall outside your desired shape.
- Use tweezers to carefully remove these stray hairs. A clean brow line enhances the overall look and ensures symmetry.
Step 3: Choose The Right Colour
Selecting the appropriate shade is vital for a natural appearance. Here’s how to choose wisely:
For Dark Hair
- Opt for a powder or pencil that is one to two shades lighter than your natural hair colour.
- This helps to soften the look and avoid harsh contrasts.
For Light Hai
- Choose a shade that is half to one shade darker than your natural hair colour.
- This provides depth and dimension while maintaining a natural appearance.
Step 4: Apply Brow Product
Now it’s time to fill in your brows using your chosen product. You can use either brow powder or a pencil.
Using Brow Powder
- Load the Brush: Dip your angled brush into the brow powder, ensuring it’s evenly coated but not overloaded.
- Start Filling: Begin at the inner part of the brow, applying light strokes in the direction of hair growth. This technique ensures a natural look, preventing the brows from appearing blocky.
- Focus on Sparse Areas: Concentrate on filling in any gaps using soft, feather-like strokes. This adds volume and texture, mimicking the natural growth of brow hairs.
Using Brow Pencil
- Create Hair-Like Strokes: Use short, flicking motions to mimic the appearance of natural hair. Avoid applying too heavily to maintain a soft finish.
- Define the Shape: Lightly outline the bottom and top edges of your brow for clear definition, then fill in any sparse areas as needed. This step ensures your brows are well-shaped and polished.
Step 5: Blend For A Natural Finish
Blending is key to achieving a polished, natural look. Here’s how to blend effectively:
- Use the Spoolie: After filling in your brows, take the spoolie brush to blend the product evenly throughout the brows. This softens any harsh lines and integrates the product with your natural hairs.
- Check for Balance: Step back from the mirror to assess whether both brows look balanced and natural. Adjust as necessary to ensure symmetry, which is vital for a cohesive look.
Step 6: Set Your Brows
To ensure your brows stay in place throughout the day, follow these final steps:
- Apply Brow Gel: Use a clear or tinted brow gel to set the hairs in place. Brush it through your brows in an upward motion to lift and define.
- Avoid Overloading: Be cautious not to apply too much product, as this can lead to a stiff appearance. A light application keeps brows looking soft and natural.

Materials Needed
1. Brow Powder Or Pencil
Choosing the right brow product is essential for achieving natural-looking brows. Opt for a shade that closely matches your hair colour to create a seamless look.
- Anastasia Beverly Hills Brow Powder Duo: This highly pigmented powder comes in two complementary shades, allowing you to customise your brow colour. It’s perfect for creating a soft, natural finish.
- Rimmel Brow This Way Sculpting Kit: This kit includes both powder and wax, providing a versatile option for sculpting and defining your brows. The wax helps to hold the powder in place for a long-lasting effect.
- Revitalash Hi-Def Brow Pencil: This pencil features a fine tip for precise application and a creamy formula that glides on smoothly. It’s great for filling in sparse areas and defining your brow shape.
2. Angled Brow Brush
An angled brow brush is essential for the precise application of brow powder or pencil. The slanted bristles allow for easy maneuvering and control, helping you to create defined strokes that mimic the appearance of natural hair. Look for a brush with firm bristles to ensure accuracy and ease of use.
3. Spoolie Brush
A spoolie brush is a versatile tool for grooming and blending your brows. Use it to comb through your brow hairs before and after application to ensure an even distribution of product. This step helps to soften any harsh lines and creates a more natural appearance.
4. Clear Brow Gel
Setting your brows in place is essential for all-day wear. A clear brow gel will help to keep your hairs in position, preventing them from straying throughout the day. Look for a gel that dries clear and provides a firm hold without leaving a stiff finish.
5. Concealer (Optional)
Using a lighter shade of concealer can enhance the shape of your brows and add definition. Apply it beneath the brow arch to highlight and lift the brow area. This technique also helps to clean up any mistakes and creates a polished look. Choose a concealer that blends seamlessly with your skin tone for the best results.
Additional Tips For A Natural Look
- Practice Makes Perfect: Filling in your brows takes practice. Don’t be discouraged if it doesn’t look perfect at first.
- Use Two Shades: For added dimension, consider using two different shades. Start with a base colour and add a slightly darker shade at the tail.
- Keep It Light: When applying products, always use a light hand. It’s easier to add more product than to take it away.
- Avoid Sharp Edges: Aim for a soft, rounded arch rather than a sharp or overly defined shape.
Highlighting And Finishing Touches
- Highlight Under the Brow: Use a highlighter or light concealer just below the arch to lift the brow area.
- Blend with Spoolie: Ensure that the highlighter is well-blended to avoid harsh lines.
Common Mistakes To Avoid
- Using the Wrong Colour: Selecting a shade that’s too dark or too light can make your brows look artificial.
- Heavy-Handed Application: Applying too much product can lead to an unnatural appearance.
- Neglecting Shape Maintenance: Regularly tweeze or wax your brows to maintain their shape and prevent them from becoming unruly.
Conclusion
Achieving beautifully filled-in eyebrows doesn’t have to be a daunting task. By following these steps, you can create a natural look that enhances your features and frames your face perfectly.
Practice is key—don’t hesitate to experiment with different techniques and products to find what works best for you. With the right tools and a bit of patience, you’ll be well on your way to flaunting flawless brows that elevate your entire makeup look. So grab your brow products, and let your natural beauty shine!
FAQs About Filling Eyebrows For Natural Look
How Do You Fill In Your Eyebrows 2022?
The most popular eyebrow trend for 2022 by far, is brow lamination. The semi-permanent treatment provides perfectly placed, brushed up brows that last for months.
What Is The Best Eyebrow Product For Sparse Eyebrows?
- Anastasia Beverly Hills Brow Wiz.
- Nyx Professional Makeup Micro Brow Pencil.
- Diorshow Brow Styler.
- Maybelline Brow Ultra-Slim Defining Eyebrow Pencil.
- Trish Mcevoy Precision Brow Shaper Eyebrow Pencil.
- Benefit Cosmetics Benefit Precisely, My Brow Pencil.
Are Thin Eyebrows Back In Style 2022?
Yes, thin brows are making a huge comeback in 2022. But don’t be alarmed – these aren’t the old over-plucked ones that made you afraid of tweezers. “Today’s thin brow still has density and texture,” says Bailey.
Can I Just Fill In My Eyebrows?
Using short dash-like strokes to mimic your natural hairs, softly fill in any sparse areas with a pencil. “Choose the color that best matches your brows and fill in really lightly so it’s barely there,” Guilis says. Use an angled brush and a similarly colored pressed powder to define the shape of your brows even more.
What Color Should Eyebrows Be?
Generally, your brows should be one to two shades darker than your hair and less vibrant. So if your hair is a dark blonde, a cool light brown would be a great choice.

