Microblading is a popular beauty treatment that enhances the appearance of eyebrows using semi-permanent pigment. However, the healing process after a microblading session is critical for achieving the best results.
Each stage of healing is unique, and proper aftercare is important to ensure your brows heal well. In this guide, we will discuss the general healing process and provide you with detailed aftercare instructions.
Let’s get straight to the point
The healing process after a microblading session is critical for optimal results. Expect redness, swelling, and dark brows in the first two days, followed by scabbing and peeling around days 5-10. During this time, avoid touching, scratching, or wetting your brows.
By day 28-42, your brows should be fully healed, revealing the final shape and color. A touch-up session is recommended to correct any patchiness after 4-6 weeks. For long-term results, avoid sun exposure, harsh skincare products, and excessive sweating. Proper aftercare ensures beautiful, well-defined eyebrows that last months.
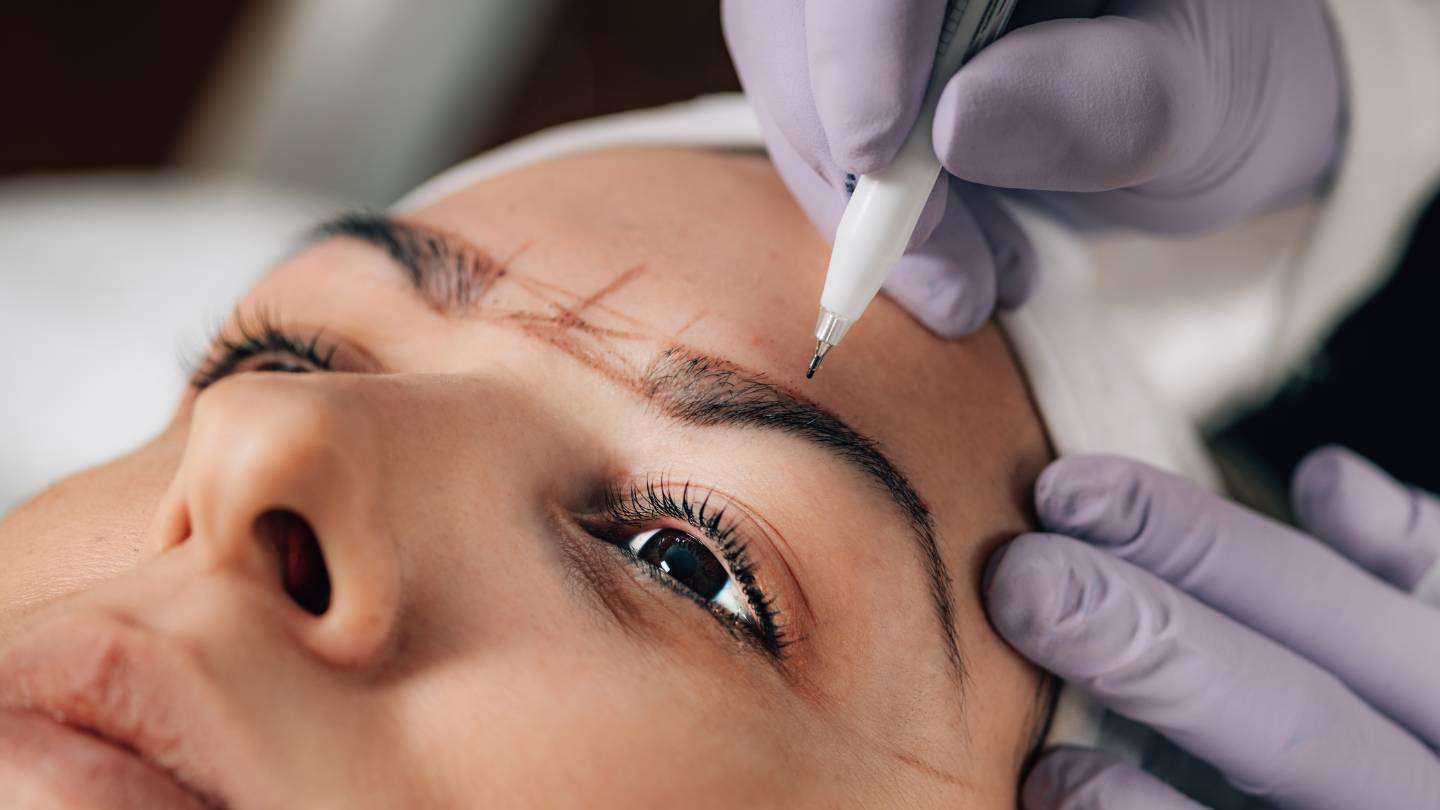
Day 1-2: Immediate Post-Procedure Effects
You will notice redness and slight swelling around your eyebrows in the first couple of days after your microblading session. This is normal as your skin reacts to the tiny incisions made during the procedure. Here’s what to expect during the initial days:
- Eyebrows appear darker: Your eyebrows may seem much darker and thicker than you anticipated. This can cause some regret or concern, but rest assured that the colour will lighten significantly during the healing process.
- Sensitivity: The area around your eyebrows may feel tender and slightly irritated. Avoid touching or rubbing your brows, as this can lead to infection or affect the pigment.
- Aftercare Instructions:
- Keep your brows dry for the first 48 hours.
- Use a cotton pad and sterile water to gently clean the area.
- Avoid wearing makeup or exposing your eyebrows to direct sunlight, pools, or saunas.
Day 3-4: Settling Down
By day three, the swelling and redness should have subsided. You’ll notice that your brows are still dark but are starting to settle into a more natural shape. Here are a few things to watch for during this stage:
- Initial colour fading: While the eyebrows will still be dark, the pigment will begin to settle and fade by 30-40% once the skin starts healing.
- No itching or scratching: It’s essential to avoid scratching or picking at the brows, even though the skin may feel a bit dry. This can disrupt the healing process and cause pigment loss.
Day 5-7: The Scabbing Phase
The scabbing phase typically begins around day five. This is one of the most challenging parts of the healing process, as the area may start to itch. The scabs that form are a natural part of the healing and should be left alone. Here’s how to handle this stage:
- Itching and irritation: It’s common to experience itching as the scabs form, but do not scratch them. Scratching can result in pigment loss and uneven healing.
- Flaking skin: Your brows will start to flake as the scabs form and eventually fall off. Everyone’s skin is different, so some people may experience more scabbing than others.
- Aftercare tips:
- Avoid getting your brows wet during this time.
- Cleanse your face carefully without disturbing the eyebrow area.
- Apply any prescribed ointment as directed by your technician.
Day 8-10: Peeling And Lightening
As you approach day eight, the scabs will begin to peel off naturally. This is when many people start to worry, as the brows will appear very light or patchy. This is perfectly normal. Here’s what to expect:
- Peeling phase: Your skin will shed the scabs, and the area may look lighter or uneven. It might seem like the pigment is fading too fast, but this is part of the process.
- Pale and uneven brows: Once the scabs fall off, the pigment underneath may seem lighter or almost invisible. This can cause concern, but it’s important to wait until the skin fully heals before assessing the final result.
Day 11-28: The Healing Continues
During this period, your brows are still healing, though the most visible stages are over. The pigment will gradually darken and settle into the skin, and the true shape and colour of your eyebrows will begin to emerge. Here’s what happens during this phase:
- Colour starts returning: After the initial lightening, the pigment will slowly reappear as your skin continues to heal.
- Shape refinement: The shape of your brows will become more defined as the healing process nears completion.
- Avoid heavy skincare products: During this time, it’s essential to avoid products with retinol, acids, or exfoliants. These can interfere with the healing process and cause the pigment to fade prematurely.
Day 28-42: Full Healing And Touch-Up
By the time you reach the fourth to sixth week, your eyebrows should be fully healed. At this point, it’s important to assess the results and determine if a touch-up is needed. Most people require a touch-up session after the initial procedure to fill in any gaps or areas where the pigment didn’t settle as expected.
- Final shape and colour: Your brows will reach their final shape and colour by the end of this phase. The pigment will have settled, and the eyebrows should look natural and well-defined.
- Touch-up session:
- Book your touch-up appointment between 4-6 weeks after the initial session.
- The touch-up session allows the artist to fill in any patchy areas or adjust the colour if necessary.
- Longevity of results: With proper care, microbladed brows can last anywhere from 18 to 30 months. However, regular touch-ups, usually annually, are recommended to keep them looking fresh.
Aftercare Tips For Long-Term Results
To ensure your brows stay vibrant and well-defined for as long as possible, follow these aftercare guidelines:
- Avoid harsh skincare products: Products containing retinoids or acids can cause premature fading of the pigment. Stick to gentle cleansers and moisturisers around the eyebrow area.
- Apply sunscreen: Sun exposure can cause the pigment to fade quickly. Always apply sunscreen with at least SPF 30 to your brows when going outside.
- Avoid frequent sweating: Activities that cause excessive sweating, such as intense workouts, can impact how long your brows last. While light activities are fine, try to avoid anything that causes excessive moisture in the brow area.
Common Side Effects During Healing
Like any cosmetic procedure, microblading comes with some potential side effects. Here’s what you might experience during the healing process:
- Redness and swelling: This is common in the first couple of days and should subside quickly.
- Scabbing: While scabbing is a normal part of healing, it’s important not to pick at the scabs to avoid disrupting the pigment.
- Itching: Itchiness during the scabbing phase is normal but should be managed carefully to prevent pigment loss.
- Uneven appearance: During the healing process, your brows may look uneven or patchy. This is normal and will be corrected during the touch-up session.
If you experience severe symptoms like infection, excessive swelling, or discharge, contact a medical professional immediately. These are signs that something may have gone wrong during the healing process.
Dry Healing Vs. Wet Healing
There are two main approaches to healing after microblading: dry healing and wet healing.
Dry Healing
With dry healing, you avoid getting your brows wet for several days. This means no washing, ointments, or creams on the brows. Dry healing can lead to more scabbing but is still commonly recommended by some artists.
Wet Healing
Wet healing involves cleaning the brows regularly with sterile water and applying a healing ointment. This method helps prevent heavy scabbing and may result in more even pigment retention. It requires more attention and care but is often preferred by modern microblading artists.
Conclusion
The healing process after a microblading session is essential for achieving the best possible results. It’s important to understand that each stage, from immediate post-procedure care to scabbing and peeling, plays an essential role in how your brows will look in the long run.
Following proper aftercare, including avoiding excessive moisture, sun exposure, and harsh skincare products, will ensure the longevity of your microbladed brows. A touch-up session around 4-6 weeks after the initial procedure is often necessary to perfect the final result.
By adhering to these guidelines and understanding what to expect, you’ll be well on your way to having beautiful, well-defined eyebrows that last for months!
FAQs About Microblading Healing
How Long Does It Take For The Eyebrows To Heal After Microblading?
The initial healing process typically takes about 7-14 days. However, complete healing, including the fading and settling of colour, may take up to 4-6 weeks.
What Can I Expect During The First Few Days Of Healing?
In the first few days, it’s normal for the eyebrows to appear darker and more intense. You may also experience mild redness and swelling around the treated area.
Is There Any Pain Or Discomfort During The Healing Process?
Some clients may experience minor discomfort or itching during the initial healing phase. It’s crucial to avoid scratching or picking at the treated area to prevent complications.
Can I Use Makeup Over My Freshly Microbladed Eyebrows During The Healing Process?
It’s advisable to avoid applying makeup on the treated area for at least the first week to prevent infection and ensure proper healing. Consult with your microblading artist for specific instructions.
Are There Any Restrictions On Activities During The Healing Period?
It’s recommended to avoid activities that may cause excessive sweating, such as intense workouts or sauna sessions, during the first week. Also, exposure to direct sunlight and swimming should be limited.
