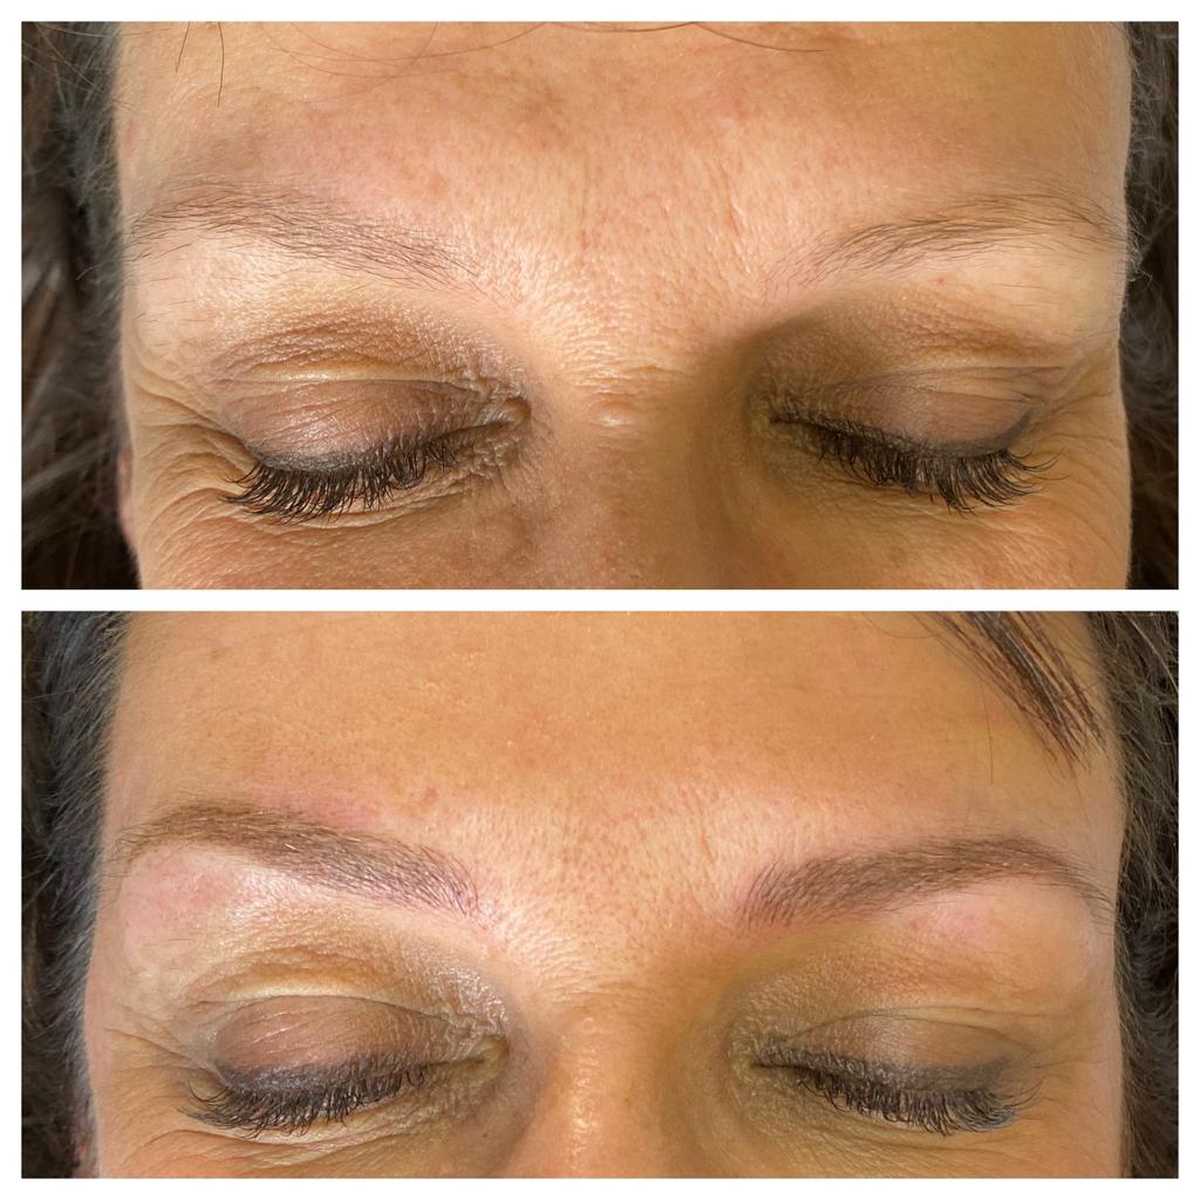
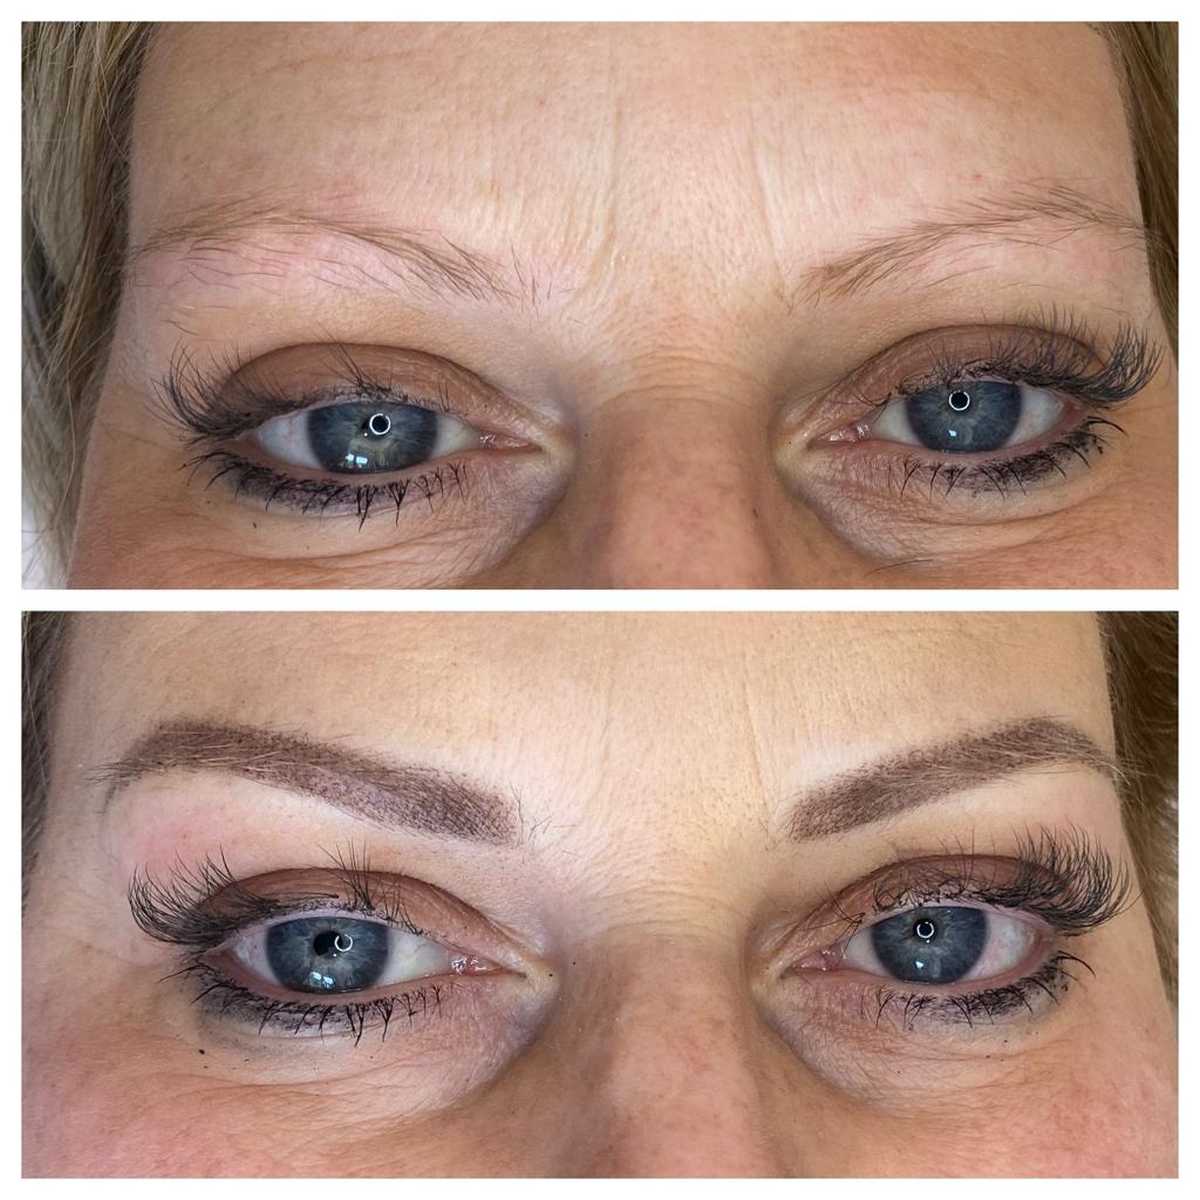
Microblading has become an increasingly popular cosmetic procedure for enhancing eyebrow appearance. As the procedure involves making small incisions in the skin and depositing pigment, proper aftercare is essential to achieve long-lasting and flawless results.
In this article, we will discuss essential aftercare steps, the healing process, and potential complications to avoid.
Let’s get straight to the point
Microblading is a popular cosmetic procedure for enhancing eyebrows, but proper aftercare is critical to achieve long-lasting results. The healing process takes 4-8 weeks and involves colour changes, tenderness, scabbing, and swelling.
To protect the sensitive skin, keep the brows clean and dry, avoid sweat, and apply the recommended aftercare cream. Follow hygiene standards to prevent infections, and avoid makeup and water exposure for at least a week.
Watch for infection signs like swelling, redness, or pus. A follow-up session is typically needed 4-6 weeks later. Proper care helps maintain the results and avoids complications.
What Happens During Healing?
The healing period following a microblading session lasts between four and eight weeks. The duration varies depending on factors such as your age, skin type, and general health. During this period, the following symptoms might occur:
- Colour changes: The pigment may appear darker immediately after the procedure and lighten as the skin heals.
- Tenderness: The treated area may feel sore.
- Scabbing: Small scabs may form, which is part of the healing process.
- Swelling: Mild swelling around the brows may occur temporarily.
Key Aftercare Practices
To protect the sensitive skin and ensure optimal healing, it’s crucial to follow the aftercare instructions provided by your artist. Let’s break down the most important steps to follow for a smooth recovery.
Cleaning Your Brows
Cleaning your microbladed brows is an essential part of the aftercare routine. Here’s how to do it effectively:
- Use a cotton pad with a few drops of water to remove any lymph fluid accumulation.
- Avoid using harsh cleansers: Stick to the aftercare products provided by your technician to prevent irritation.
- Keep your hands clean: Always wash your hands before touching your face, especially around the treated area.
- No soaking: Cleaning does not mean drenching your eyebrows in water. Use a slightly damp cotton pad for gentle cleaning.
Maintaining Dryness and Hygiene
Preventing Pigment Disruption
It’s essential to keep your brows dry for the first two weeks following the procedure. Any excess moisture, such as water or sweat, can affect the pigment settling process. Consider the following tips:
- Avoid getting water in your eyes while showering.
- Postpone swimming until after the brows have completely healed.
Sweat Protection
Sweating can significantly impact the appearance of your microbladed eyebrows, as the salt in sweat may disrupt the pigment. Follow these tips to avoid complications:
- Wear an absorbent headband when exercising to prevent sweat from reaching your brows.
- Use sports sweatbands during physical activity.
Applying Aftercare Cream
After a microblading procedure, it is recommended to apply soothing lotions or ointments as directed by your technician. This helps in promoting faster healing and reducing irritation. However, be careful to:
- Avoid makeup around your brows for at least two weeks.
- Refrain from using harsh products like makeup removers or creams that can irritate the sensitive area.
Avoiding Infections
Since the microbladed area is sensitive and prone to infection, it’s essential to ensure your technician uses disposable, single-use tools. If you’re unsure whether a new tool has been opened for your procedure, do not hesitate to ask.
Potential Risk Factors
Although microblading is often considered safe, it carries certain risks similar to traditional tattooing. Always ensure that both the technician and the salon adhere to high hygiene standards.
After-Microblading Skin Care
Taking care of your skin post-microblading is critical to achieving the desired results. Proper aftercare includes:
- Cleaning the area with a cotton swab dipped in sterile water approximately two hours after the procedure.
- Avoiding water exposure on the brows for at least a week.
- No makeup for a week to prevent irritation.
- Refrain from scratching or picking at scabs that may form on your brows.
Following these steps ensures the pigment settles properly and minimises potential complications.
Additional Tips
After your microblading session, following your technician’s instructions ensures the best healing and final result. Avoid excessive exposure to sunlight, which can cause the pigment to fade faster. Applying high SPF sunscreen on the area after healing may also help prolong the results.
Potential Complications
Although microblading is generally safe, pigment-related infections or allergic reactions may occur. Some common signs of infection include:
- Swelling or redness that worsens after a few days.
- Discharge from the microbladed area.
- Yellow-coloured pus indicating infection.
If you notice any of these symptoms, consult a healthcare professional immediately. Delaying treatment could lead to more severe issues, as the eyebrow area is close to the eyes and brain, increasing the risk of serious infection.
Common Aftercare Mistakes
- Skipping aftercare cream: Failing to apply prescribed lotions can lead to prolonged healing and infection.
- Over-cleaning the area: Excessive cleaning can irritate the delicate skin, causing issues with pigment retention.
- Touching the brows too often: Constantly touching the area increases the risk of infection.
Microblading Touch-Up Sessions
A follow-up appointment is often required about 4 to 6 weeks after your initial microblading session. This touch-up ensures the pigment has settled evenly and any gaps or fading areas are corrected. Regular touch-ups are needed to maintain the desired look as the pigment naturally fades over time.
Conclusion
Proper aftercare is essential for ensuring your microbladed eyebrows heal well and last as long as possible. By following the steps outlined in this guide, including keeping the area clean, maintaining dryness, and avoiding certain activities, you can protect your investment and achieve beautiful, natural-looking brows.
Microblading aftercare may seem complex at first, but it becomes manageable with proper planning. Each step, from cleansing the treated area to applying the prescribed ointments, is vital to ensuring a successful healing process and long-lasting results. Avoiding common mistakes, such as over-cleaning or touching the brows, can prevent complications and ensure your brows look their best.
FAQs About Microblading
What Not To Do After Eyebrow Microblading?
During the first week after your treatment, you should avoid getting any liquid, lotion, soap, or makeup on the area around your eyebrows at all costs. Please avoid getting water on the treated area while you wash your face, paying special attention to the area around your eyebrows. Either keep your face away from the shower head while you’re in the shower or switch to taking a bath.
What Happens Five Days After Microblading?
On day 5, you’ll notice that things are starting to go in a different direction. It is important to resist the urge to scratch your brows at this stage of the healing process because the wound may still be open. Even though your brows may be irritating, it is best not to scratch them. It’s possible that a thick layer of scabbing will grow, which will cover up the fine hair strokes that were generated earlier.
When Can I Wash My Brows After Microblading?
When it comes to the issue, “When can I start washing my eyebrows after getting them microbladed?” The answer is “immediately.” The quick answer is at least ten days, but the longer answer is that it takes as much time as it takes for your eyebrows to cleanse and cure themselves naturally.
How Do You Shower With Microbladed Eyebrows?
Take your time lathering your hair in the shower and keep your hands over your brows to avoid getting water in your eyes. Do not expose your face to the water while showering. Avoid doing face washing while you’re in the shower. Make sure you’re not washing your face in the treatment area by using a mirror.
Can I Shower Two Days After Microblading?
Remember that you must avoid getting any moisture on your face or brows for the first twenty-four hours following the microblading treatment. You are free to resume washing your face when an interval of twenty-four hours has passed. However, before applying any soap, even the mildest one possible, you should make sure the brows have sufficiently healed.
